Article updated
at 05 May 2022
Visual Studio Code can be used to edit the source code, build the application and finally debug it. Toradex provides the necessary configuration files and instructions to setup your system.
In contrast to fully integrated IDEs, setting up Visual Studio Code (short. VSCode) requires you to setup a number of software packages, which finally work together to build the complete development environment. The software packages can be split into three groups:
- VSCode and plugins
- Arm build tools (compiler etc.)
- Debug tools
The packages can be installed in any order (well, almost: VSCode must be installed before VSCode plugins can be installed).
Understanding the purpose of individual components helps to debug potential problems and understand the behavior of the system. Therefore I want to first give an overview over these parts.
You can look at VSCode as an intelligent text editor which provides an extensive framework to add functionality through plugins. VSCode includes a project explorer, which can show the contents of one or multiple folders as a workspace.
There is more information on required plugins further down in this list.
C/C++:
This plugin offers many features to simplify editing of C/C++ code, including Syntax highlighting, Intellisense (finding definitions of symbols), auto-completion of keywords and identifier names, and marking syntax errors while typing.
Cortex-Debug:
This plugin adds support for debugging ARM executables through a GDB Server.
CMake:
Syntax highlighting for CMakeLists.txt
ARM:
Syntax highlighting for ARM assembly code
Linker Script:
Syntax highlighting for linker scripts
GNU Arm Embedded Toolchain:
This is the C/C++ compiler und linker along with additional tools. It is used to turn your source code into a binary executable.
CMake:
CMake is a tool which turns compiler-independent project definitions into compiler-specific project definitions.
NXP provides such independent project definitions in CMakeLists.txt files. CMake converts these into makefiles that can be processed by the GNU Arm Embedded Toolchain.
Segger J-Link: (for J-Link hardware debugger only)
This software package contains the J-Link GDB server, which connects to VSCode on one side, and to the J-Link JTAG hardware on the other side.
OpenOCD: (for generic hardware debugger)
OpenOCD is an open-source debugger, supporting a wide variety of JTAG hardware interfaces. For customers using a JTAG adapter other than the J-Link, this probably is the matching software. The package contains a GDB server, which connects to VSCode on one side, and to the J-Link JTAG hardware on the other side.
Click the tab below to select whether you develop on a Windows or Linux host machine.
Visual Studio Code is still undergoing significant development. Therefore I will point out the version used at the time when these instructions were written.
- Instructions were written in August 2019
- Tested on a Windows 10 Build 1903
Details
- Download the installer VSCodeUserSetup-x64-1.36.1.exe
- Execute the installer
Keeping all the default settings for installation is just fine.
| Icon |
Plugin Name |
Tested Version |
Required /
Optional |
Codename |
 |
C/C++ |
0.24.1 |
Required |
ms-vscode.cpptools |
 |
Cortex-Debug |
0.3.1 |
Required |
marus25.cortex-debug |
 |
CMake Syntax Highlighting |
0.0.17 |
Optional |
twxs.cmake |
 |
ARM Assembly highlighting |
0.5.0 |
Optional |
dan-c-underwood.arm |
 |
Linker Script highlighting |
0.1.0 |
Optional |
amapleaf.linker-script |
There are two options to install a Visual Studio Code plugin
Option 1: From the Windows Command Prompt
- Open a command prompt
- enter
$ code --install-extension <Codename>
Use Codename from the table above (without the <angle brackets>)
Option 2: From withing VSCode
- Open Visual Studio Code
- Select View → Extensions
This will show the Extension sidebar
- In the search box above the Extension sidebar, type the <Codename> from the table above (without the <angle brackets>) or another reasonable search term
. Click on the little green Install button which appears next to the found plugin
Use the instructions above to install each of the listed plugins:
Details
Download the installer gcc-arm-none-eabi-8-2018-q4-major-win32-sha2.exe
Execute the installer
Keeping all the default settings for installation is just fine.
Manual Step: Add a system environment variable ARMGCC_DIR
- Use your file explorer to identify the path where the GNU Arm Embedded Toolchain has been installed.
By default, this will be:
C:\Program Files (x86)\GNU Tools ARM Embedded\8 2018-q4-major
- Click [START] →type [environment] (without brackets) → select [Edit the system environment variables] → Click [Environment Variables] → in the lower part click [New...] to add a new System variable
- Variable Name = "ARMGCC_DIR" (without quotes), Variable value = [path which you looked up above], for example "C:\Program Files (x86)\GNU Tools ARM Embedded\8 2018-q4-major" (without quotes)
- Click [OK] three times to close all dialogs.
Download the installer cmake-3.14.4-win64-x64.msi
Execute the installer
Keeping all the default settings for installation is just fine.
Details
To do hardware debugging, VSCode depends on external GDB servers to access the hardware over JTAG. Depending on your JTAG adapter you might need one or the other software package mentioned below.
The installations can work side by side.
Note: This step is only required if you plan to use a Segger J-Link debug hardware adapter.
Download the installer JLink_Windows_V646.exe
Execute the installer
Keeping all the default settings for installation is just fine.
Note: This step is only required if you plan to use a debug hardware adapter other than Segger J-Link.
Attention: The installation instructions of OpenOCD contain a number of manual steps. Depending on your actual hardware and software setup, you may need to adjust the installation.
This is a generic guideline which helps you to avoid certain pitfalls, but Toradex cannot make sure that the instructions will work for all setups. The installation shouldn't be too complex, but it will require some work and some technical understanding to get it running.
We will try to improve the OpenOCD user experience in the future.
- Download the installer openocd-0.10.0.7z
Unzip the contents to c:\Program Files
(so the binaries end up in c:\Program Files\openocd-0.10.0\bin )
- Keeping all the default settings for installation is just fine.
Open the VSCode user settings file settings.json:
File → Preferences → Settings
Select User settings
Enter "json" in the search bar (with or without double quotes)
Locate a link "Edit in settings.json" and click on it. This will open the file C:\Users\YOURNAME\AppData\Roaming\Code\User\settings.json
Add the following two lines to the settings.json file, between the curly braces {}:
"cortex-debug.armToolchainPath": "C:/PROGRA~2/GNUTOO~1/82018-~1/bin",
"cortex-debug.openocdPath": "C:/Program Files/openocd-0.10.0/bin/openocd.exe"
Please note:
(a) The paths on your system might be different. Make sure the path matches your actual file locations.
(b) The armToolchainPath needs to be given in legacy-compatible 8.3 location. You can use dir /x in the command shell to see the short names.
(c) All paths in VSCode are defined with forward-slashes /
Save the file settings.json
Locate the OpenOCD configuration file for your JTAG adapter. For the Olimex ARM-USB-OCD-H adapter, the file can be found here:
C:\Program Files\openocd-0.10.0\share\openocd\scripts\interface\ftdi\olimex-arm-usb-ocd-h.cfg
Create another configuration file:
C:\Program Files\openocd-0.10.0\share\openocd\scripts\target\imx7_m4.cfg
set _CHIPNAME imx7
set _TARGETNAME $_CHIPNAME.cpu_m4
set _CORESIGHT_JTAG_DP_ID 0x5ba00477

transport select jtag
adapter_khz 4000

jtag newtap imx7 cpu -irlen 4 -ircapture 0x01 -irmask 0x0f -expected-id 0x5ba00477
dap create imx7.dap -chain-position imx7.cpu

target create imx7.cpu_m4   cortex_m -dap imx7.dap -ap-num 4
targets $_TARGETNAME
The folowing steps need to be done for every project you want to debug:
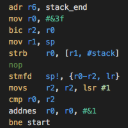
Open the launch.json file of the project. If you go for one of the default examples, launch.json will already contain a configuration for the J-Link Debug hardware.
Copy the configuration (everything from {"name":... to ] } ). Separate the two configurations with a comma ,.
Adjust the new configuration to look as the one below. Keep the name of the .elf files, add non-existing parameters, and delete extra parameters.
 {
    "name": "OpenOCD Debug PROEJECTNAME",
    "request": "launch",
    "type": "cortex-debug",
    "rtos": "FreeRTOS",
    "servertype": "openocd",
    "interface": "jtag",
    "device": "MCIMX7D5_M4",
    "cwd": "${workspaceRoot}",
    "executable": "armgcc/debug/PROEJECTNAME.elf",
    "configFiles": [
        "C:/Program Files/openocd-0.10.0/share/openocd/scripts/interface/ftdi/olimex-arm-usb-ocd-h.cfg",
        "C:/Program Files/openocd-0.10.0/share/openocd/scripts/target/imx7_m4.cfg"
    ]
},
Visual Studio Code is still undergoing significant development. Therefore I will point out the version used at the time when these instructions were written.
- Instructions were written in August 2019
- Tested on Ubuntu 18.04.3 (running in a VirtualBox VM on a Windows 10 host)
Details
Download the .deb package (64-bit) code_1.37.1-1565886362_amd64.deb
Open a Terminal
Execute the installer. You may need to adjust the folder name if you downloaded the .deb package to a different location:
$ osboxes@osboxes:~$ sudo apt -y install ~/Downloads/code_1.37.1-1565886362_amd64.deb
For more options, please refer to the Visual Studio Code setup page.
| Icon |
Plugin Name |
Tested Version |
Required /
Optional |
Codename |
|
C/C++ |
0.24.1 |
Required |
ms-vscode.cpptools |
|
Cortex-Debug |
0.3.1 |
Required |
marus25.cortex-debug |
|
CMake Syntax Highlighting |
0.0.17 |
Optional |
twxs.cmake |
|
ARM Assembly highlighting |
0.5.0 |
Optional |
dan-c-underwood.arm |
|
Linker Script highlighting |
0.1.0 |
Optional |
amapleaf.linker-script |
There are two options to install a Visual Studio Code plugin
**Option 1: From the command line **
Open a terminal
enter
osboxes@osboxes:~$ code --install-extension <Codename>
Use Codename from the table above (without the <angle brackets>)
Option 2: From withing VSCode
Open Visual Studio Code
Select View → Extensions.This will show the Extension sidebar
In the search box above the Extension sidebar, type the <Codename> from the table above (without the <angle brackets>) or another reasonable search term
Click on the little green Install button which appears next to the found plugin
Details
Download the .deb packages (64-bit)
libreadline6_6.3-8ubuntu2_amd64.deb
gdb-arm-none-eabi_7.10-1ubuntu3+9_amd64.deb
Open a Terminal
Enter the following command
   osboxes@osboxes:~$ sudo apt -y install gcc-arm-none-eabi binutils-arm-none-eabi openocd
   osboxes@osboxes:~$ sudo apt -y install ~/Downloads/libreadline6_6.3-8ubuntu2_amd64.deb
   osboxes@osboxes:~$ sudo apt -y install ~/Downloads/gdb-arm-none-eabi_7.10-1ubuntu3+9_amd64.deb
- Manual Step: Add a system environment variable ARMGCC_DIR
osboxes@osboxes:~$ sudo -H gedit /etc/environment
| Icon |
Name |
Tested Version |
Download Link |
 |
CMake |
3.10.2 |
|
- Open a Terminal
- Enter the following command
osboxes@osboxes:~$ sudo apt -y install cmake
Details
Note: This step is only required if you plan to use a Segger J-Link debug hardware adapter.
- Download the .deb package (64-bit) JLink_Linux_x86_64.deb
- Open a Terminal
- Execute the installer. You may need to adjust the folder name if you downloaded the .deb package to a different location:
osboxes@osboxes:~$ sudo apt -y install ~/Downloads/JLink_Linux_x86_64.deb
For more options, please refer to the Segger J-Link download page.
Note: This step is only required if you plan to use a debug hardware adapter other than Segger J-Link.
Attention: The installation instructions of OpenOCD contain a number of manual steps. Depending on your actual hardware and software setup, you may need to adjust the installation.
This is a generic guideline which helps you to avoid certain pitfalls, but Toradex cannot make sure that the instructions will work for all setups. The installation shouldn't be too complex, but it will require some work and some technical understanding to get it running.
We will try to improve the OpenOCD user experience in the future.
(The basic installation was already be done as part of step 2. above.)
Open the VSCode user settings file settings.json:
File → Preferences → Settings
Select User settings
Enter "json" in the search bar (with or without double quotes)
Locate a link "Edit in settings.json" and click on it. This will open the file ~/.config/Code/User/settings.json
Add the following line to the settings.json file, between the curly braces {}:
"cortex-debug.armToolchainPath": "/usr/bin",
Please note:
(a) The paths on your system might be different. Make sure the path matches your actual file locations.
Save the file settings.json
Locate the OpenOCD configuration file for your JTAG adapter. For the Olimex ARM-USB-OCD-H adapter, the file can be found here:
/usr/share/openocd/scripts/interface/ftdi/olimex-arm-usb-ocd-h.cfg
Create another configuration file:
/usr/share/openocd/scripts/target/imx7.cfg
# Freescale i.MX7 series solo/dual core processor

set _CHIPNAME   imx7
set _TARGETNAME $_CHIPNAME.m4

source [find target/swj-dp.tcl]

swj_newdap $_CHIPNAME dap -irlen 4 -ircapture 0x01 -irmask 0x0f -expected-id 0x5ba00477

# GDB target: Cortex-M4, using DAP

target create $_TARGETNAME cortex_m -chain-position $_CHIPNAME.dap -ap-num 4
# $_TARGETNAME configure -rtos FreeRTOS

adapter_khz 4000
The folowing steps need to be done for every project you want to debug:
Open the launch.json file of the project. If you go for one of the default examples, launch.json will already contain a configuration for the J-Link Debug hardware.
Copy the configuration (everything from {"name":... to ] } ). Separate the two configurations with a comma ,.
Adjust the new configuration to look as the one below. Keep the name of the .elf files, add non-existing parameters, and delete extra parameters.
 {
    "name": "OpenOCD Debug PROEJECTNAME",
    "request": "launch",
    "type": "cortex-debug",
    "rtos": "FreeRTOS",
    "servertype": "openocd",
    "interface": "jtag",
    "device": "MCIMX7D5_M4",
    "cwd": "${workspaceRoot}",
    "executable": "armgcc/debug/PROEJECTNAME.elf",
    "configFiles": [
        "/usr/share/openocd/scripts/interface/ftdi/olimex-arm-usb-ocd-h.cfg",
        "/usr/share/openocd/scripts/target/imx7_m4.cfg"
    ]
},
