If U-Boot supports the framebuffer, U-Boot can be used to display a splash screen or a custom company logo.
The customization of the bootloader splash screen on Torizon is currently not covered as a use case. Although the instructions provided in this article might work, Toradex does not encourage you to re-build the components of TorizonCore from the source. We do support custom splash screen on TorizonCore as early as the initramfs is loaded, see the article Splash Screen Customization on TorizonCore for more details.
This article has been written with the customization of the Toradex Reference Images for Yocto Project in mind.
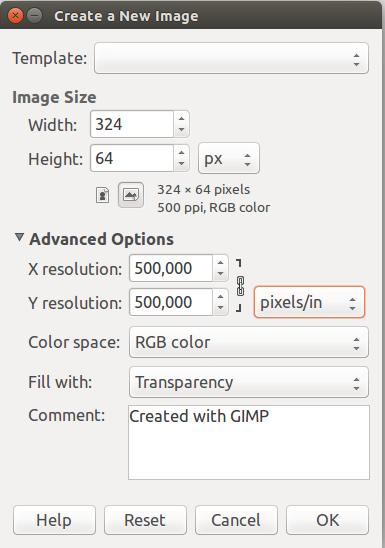
Create a new file in GIMP and choose a dimension multiple of 8. As an example, a 324 x 64 pixels image was created, configured as seen in the picture below:
Write some text or your company's name.

U-Boot can read a specific image format. Use the following command to convert the PNG image to BPM.
convert testlogo.png -type Palette -colors 224 -depth 8 -compress none -verbose BMP3:testlogo.bmpWarning: 8-bit depth is a requirement. It has been reported that the parameter -depth 8 from the command above does not always work. Make sure that your image bit depth is correct manually. A possible workaround is to change one or more pixel colors, in a way that is is not perceptible but does change the image bit depth to 8 bits.
To get the source code, toolchain, and the instructions on how to build a custom U-boot, follow the U-Boot source article.
Toradex has its own logo set in the U-boot source. The logo can be found at "u-boot-toradex/tools/logos/toradex.bmp". A simple option to have a custom logo is replacing toradex.bmp file. It is necessary to keep the same “toradex.bmp” file name for the build system to find the logo.
cp ~/testlogo.bmp ~/u-boot-toradex/tools/logos/toradex.bmpIn BSP 5.0 video stack is disabled by default in U-Boot, so you have to enable it manually by adding CONFIG_DM_VIDEO=y to defconfig of the module you're using. You can also revert this patch.
Compile the U-boot according to the article quoted above.
Prepare an SD card and update your module as described in the articles below (according to the module of interest):
Flashing Embedded Linux to iMX6 Modules
Flashing Embedded Linux to iMX7 Modules
Flashing Embedded Linux to Vybrid Modules
Flashing Embedded Linux to Tegra Modules
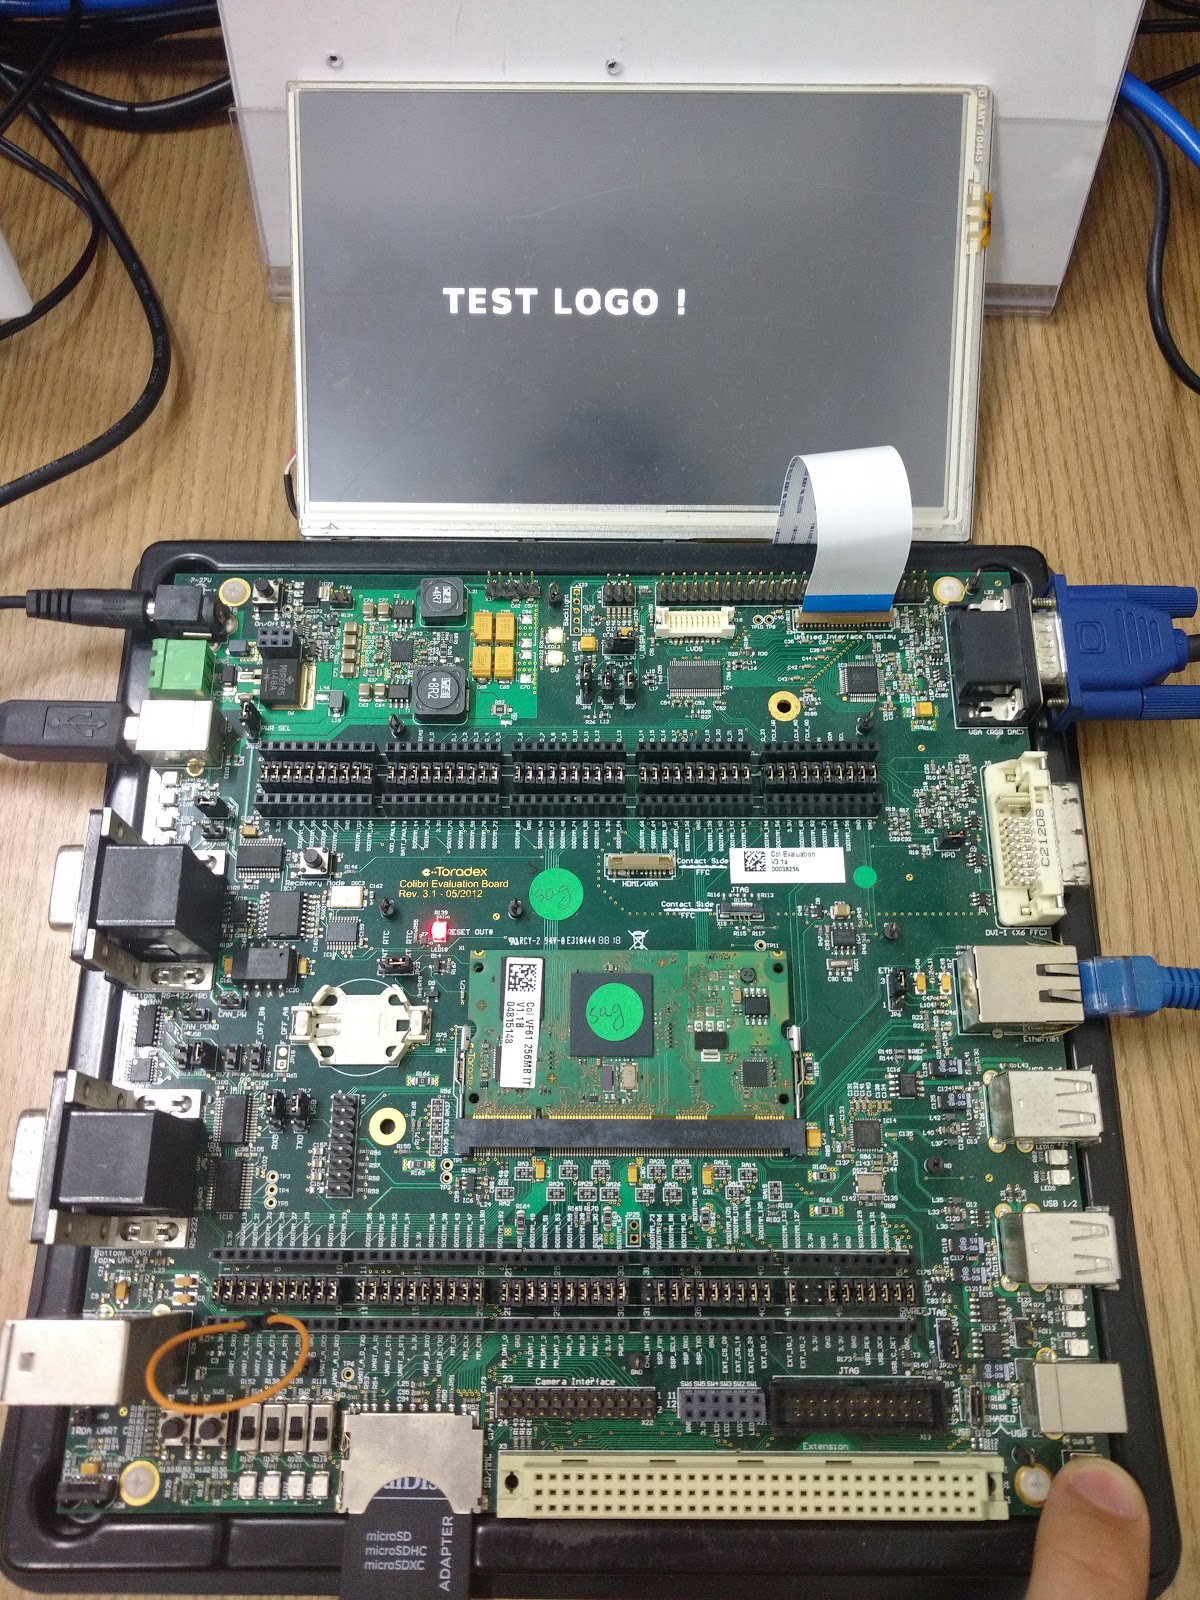
After U-Boot is compiled and updated on the module, the result is the following:
Note: When using RGB interfaces with Apalis iMX6 based modules the RESET_MOCI# signal must be released with the following command in the U-Boot console:
gpio clear 28It is also possible to load custom images at runtime. The image can be read into memory from a variety of sources.
Network TFTP:
tftp ${loadaddr} <bmp file name>MMC/SD Card:
mmc dev 0mmc rescanload mmc 0 ${loadaddr} <bmp file name>USB Storage:
usb startload usb <device number> ${loadaddr} <bmp file name>After loading the image into memory address, display it with the bmp command:
bmp display ${loadaddr}You can also use a splash screen boot logo stored on a FAT partition of a eMMC/SD/USB drive, instead of using the one embedded in the U-Boot binary, and it will also be loaded and shown automatically. To achieve that set the splashsource variable to one of the supported storage devices for the splash image. For example, if the logo is stored in the /boot directory of the rootfs eMMC partition as logo.bmp, set these environment variables using the U-Boot shell:
setenv splashfile /boot/logo.bmpsetenv splashsource mmc_fssaveenvresetThe supported values for splashsource are: - mmc_fs - usb_fs.
It is possible to adjust the position of the splash screen on the display by setting the splashpos variable. To set the logo position to x pixels and y lines:
setenv splashpos <x>,<y>Use the following configuration to set the splash screen position to the center of the screen:
Colibri iMX7 # setenv splashpos m,mTo show how U-Boot can be easily customized, we created a simple practical example where U-Boot changes the U-Boot splash screen when the module starts to update.
Create a PNG image in GIMP and convert it to BMP as explained above.
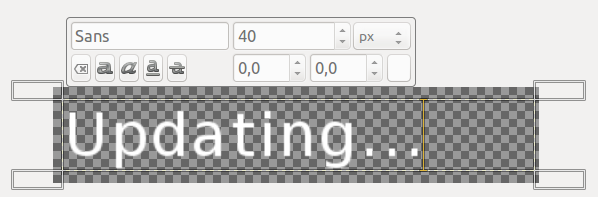
Store the image into a USB flash drive, SD Card, or TFTP server, in our case, the BMP file was stored on a TFTP server.
Create an environment variable that loads the image, displays it, and starts to update.
run setupdatesetenv update_logo 'tftp ${loadaddr} updating.bmp && bmp display ${loadaddr} && run update'run update_logoAs soon as ‘run update_logo’ is given, the image is first displayed and then the update process goes on.
The result is shown in the following video.
