acontis EC-Master EtherCAT Stack
Acontis Technologies
Acontis technologies is a leading provider for EtherCAT Technology, Windows real-time software, and Real-Time Virtualization/Hypervisor Technology. Please refer to the acontis technologies article to learn more.
EtherCAT System Architecture
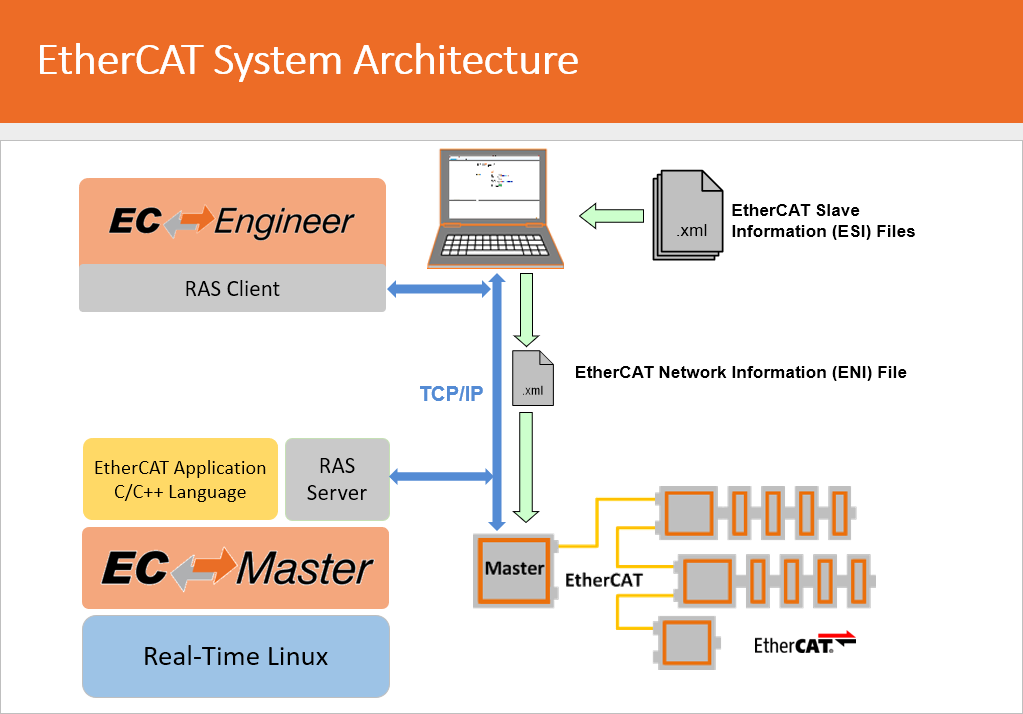
On the master hardware, we have a standard Linux operating system - optionally with Real-Time performance. The EtherCAT master library provides a C API to the application. To create the required network configuration it's required to use the EC-Engineer tool. Every EtherCAT slave comes with an EtherCAT Slave Information file – the so-called ESI file. The file describes all features and options of the slave. Based on the ESI the operator creates EtherCAT Network Information file required by the master. The optional TCP/IP connection enables the RAS-Client and Server to provide online features, like scanning the network with EC-Engineer.
EC-Master Architecture
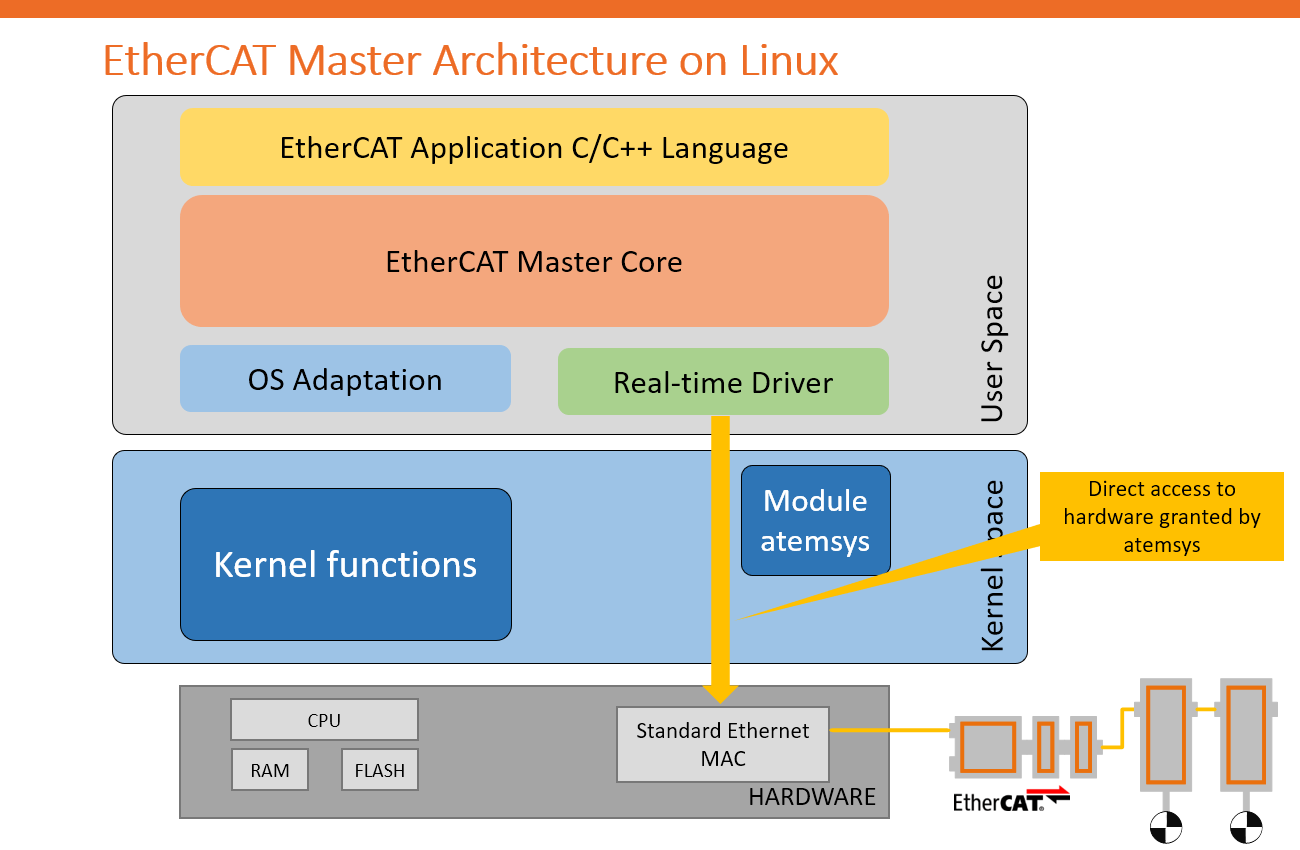
The acontis Real-time Driver replaces the standard Linux Ethernet driver for EtherCAT usage. The driver runs in userspace and handles the MAC directly for the high-performance cyclic operation. The kernel module atemsys grants access to the hardware by completely bypassing the Linux network stack.
Supported Modules
The acontis Partner Demo Iamge for EtherCAT master is available for the following Computer on Modules:
Other modules are supported by the EC-Master, but the pre-built Partner Demo Image is not available. See the list of supported modules and how to get started on acontis Technologies.
How to Get Started
This section provides instructions for you to quickly get started with the acontis technologies EC-Master demo.
First, you have to load the Toradex Easy Installer on the target module and select acontis technologies EC-Master Linux Minimal Image (PREEMPT_RT), from the list of available images, to be installed:

Quickstart with the EC-Master Demo
Connect the EtherCAT devices to the Ethernet port of your board and then you have two options:
- Access the debug UART, also known as serial terminal.
- Connect it through an additional Ethernet interface (like one USB-Ethernet adapter) using SSH.
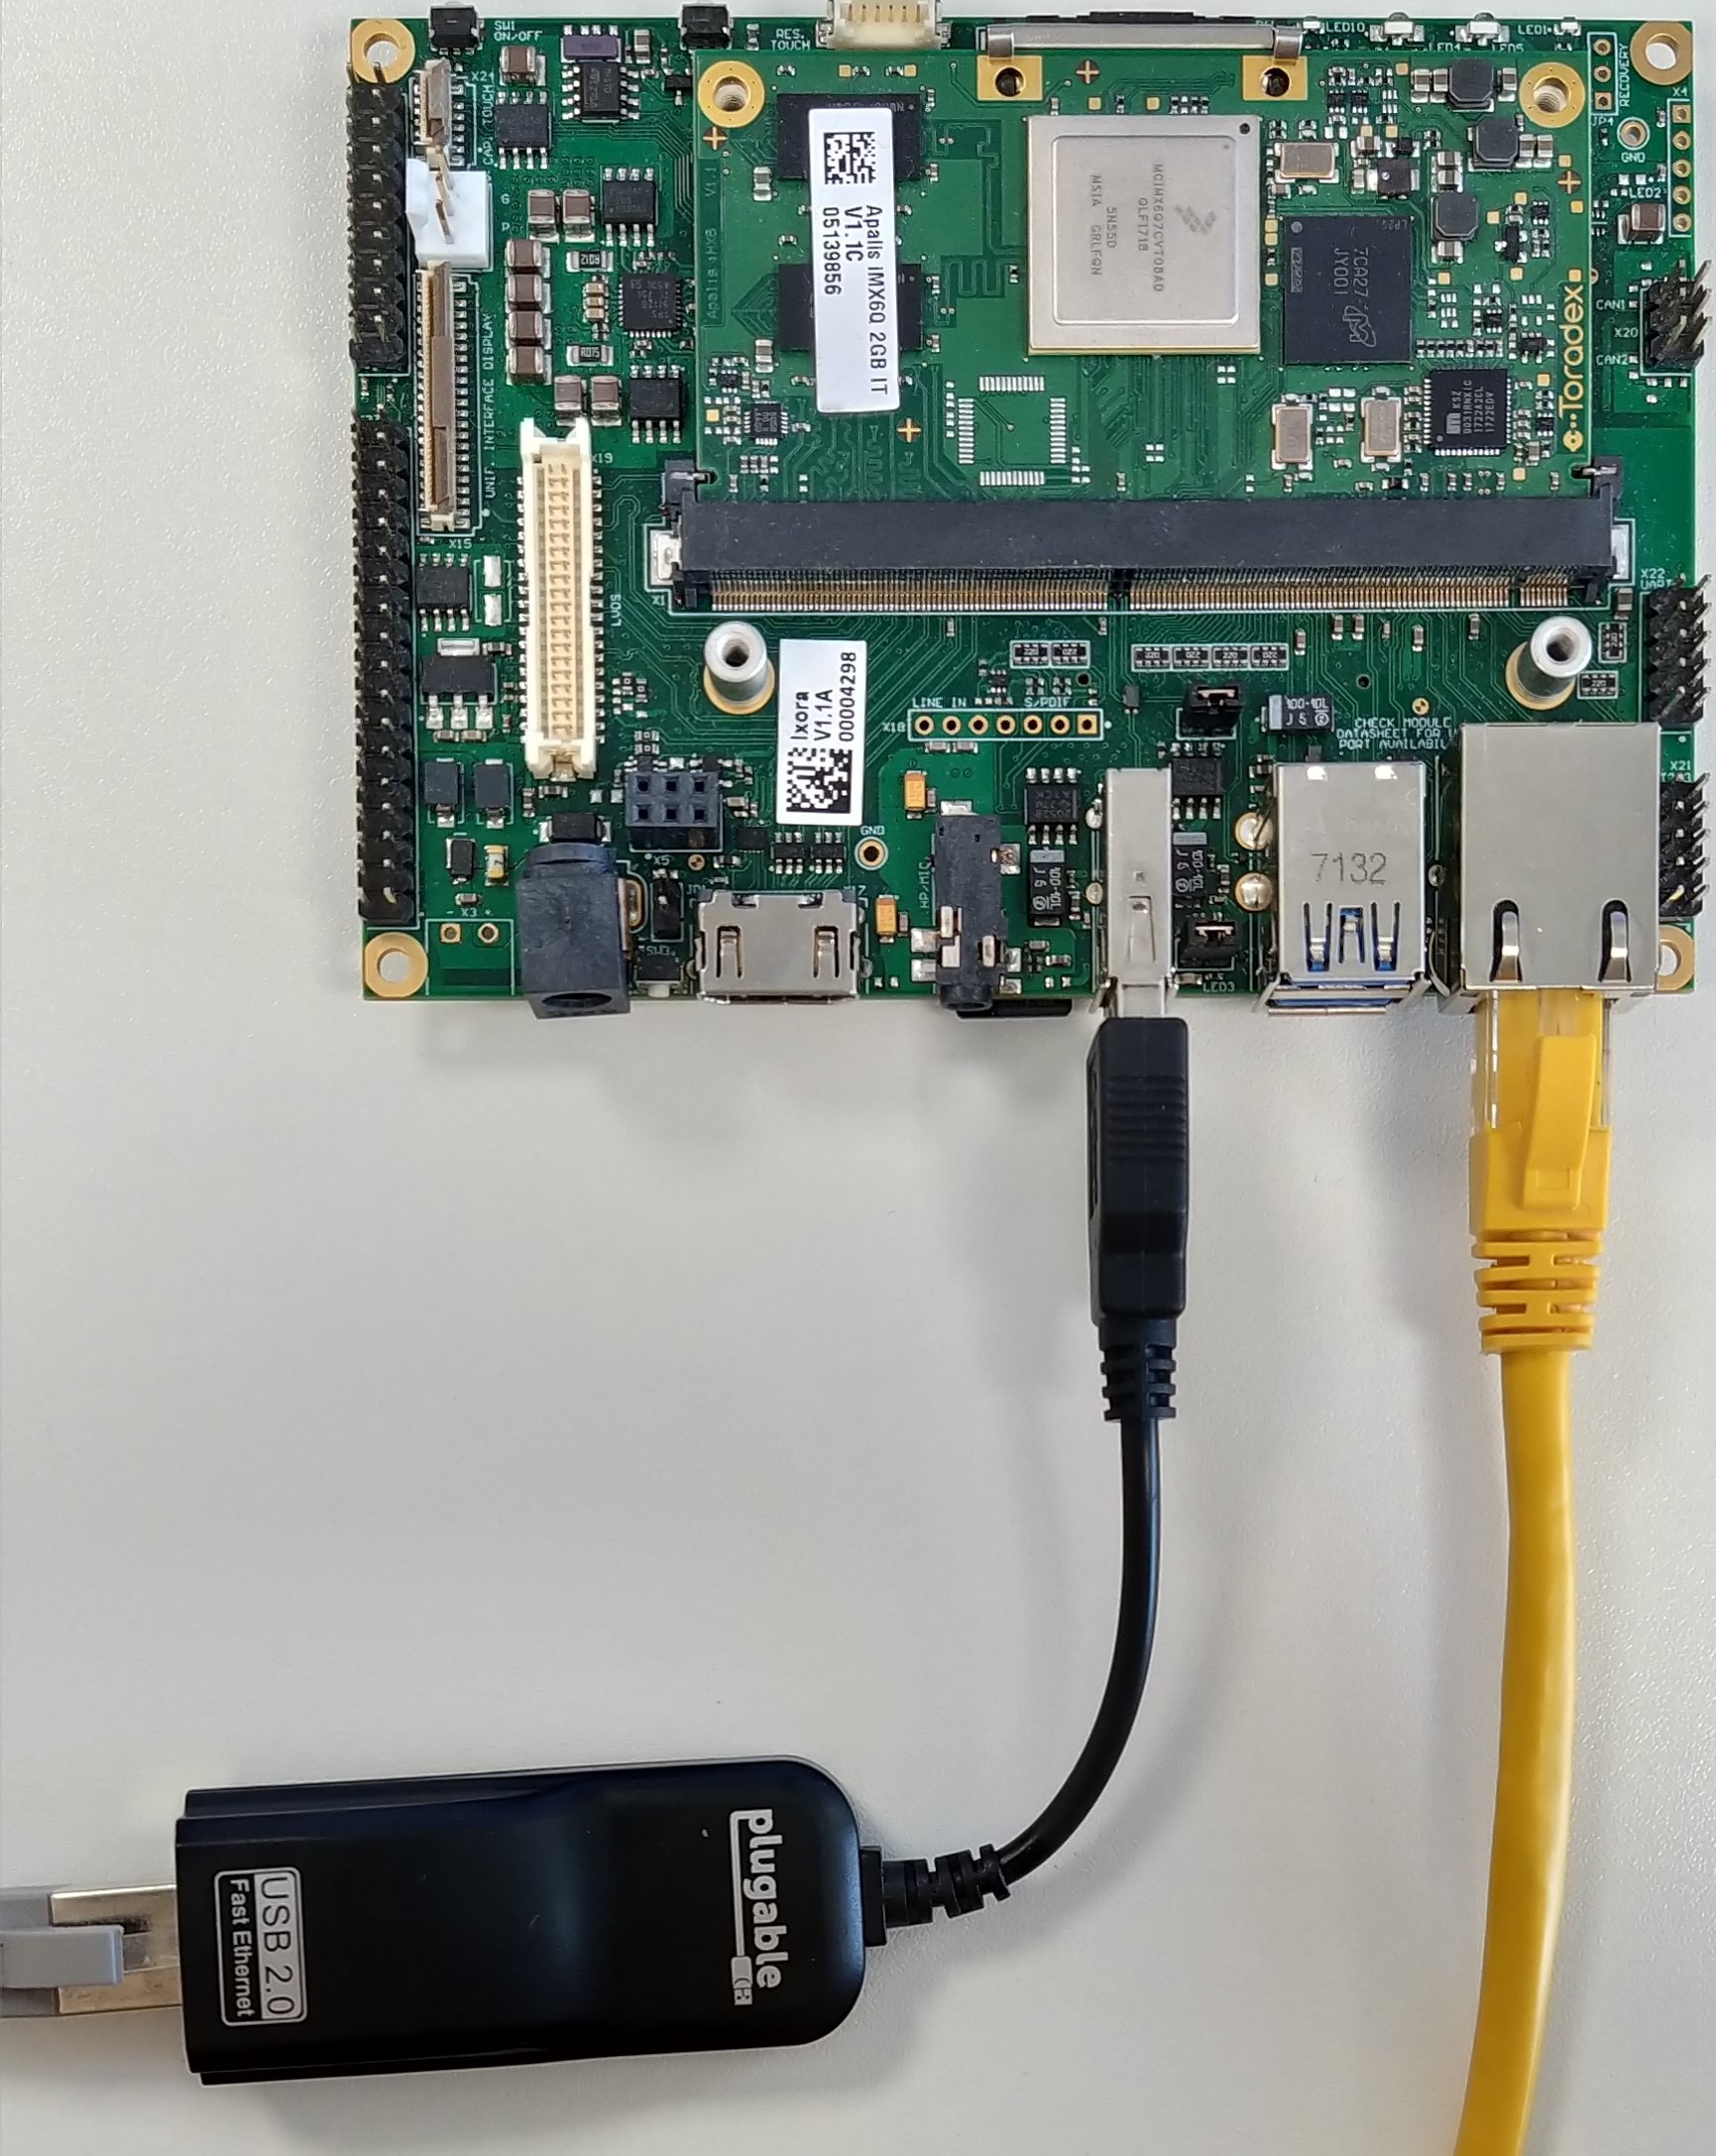
After setting up a connection to the board, navigate to /home/root:
# cd /home/root
This directory will have the following content:
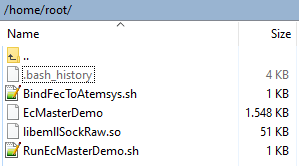
The image comes with a precompiled EcMasterDemo binary and non-real-time capable link-layer libemllSockRaw.so. Please run the RunEcMasterDemo.sh by typing the following command on the board's Linux console:
# ./RunEcMasterDemo.sh
Evaluate EC-Master + EC-Engineer
Request an evaluation version of EC-Master for Linux and EC-Engineer on Acontis Eval Request page.
The acontis sales team will send you the download links to the requested packages. After requesting the required packages, please:
- Install the EC-Engineer on a Windows machine.
- Unpack the
EC-Master-V3.x.y.zz-Linux-ARM_[32Bit|64Bit]-Evalfile.
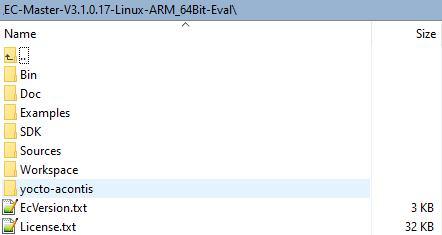
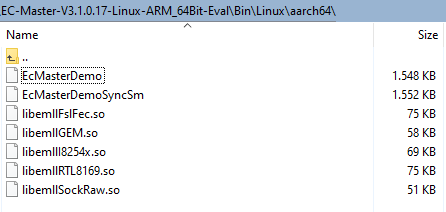
Copy the optimized link layer libemllFslFec.so from \Bin\Linux\aarch64 to /home/root of your board:
Unbind the Ethernet interface from Linux and bind it to atemsys Kernel module by running the command below:
# ./BindFecToAtemsys.sh
Check if the bind was successful with the following command:
# dmesg | tail
Expected Output:
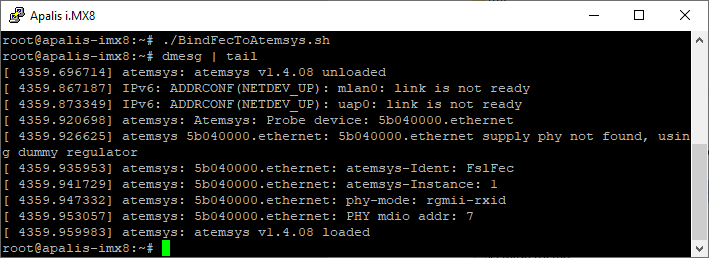
Run EcMasterDemo with an optimized link layer for FEC, see also RunEcMasterDemo.sh:
# ./EcMasterDemo -fslfec 1 1 custom imx6 rgmii 7 nopinmuxing nomacaddr -t 0 -sp
# ./EcMasterDemo -fslfec 1 1 custom imx8 rgmii 7 nopinmuxing nomacaddr -t 0 -sp
# ./EcMasterDemo -fslfec 1 1 custom imx8 rmii 2 nopinmuxing nomacaddr -t 0 -sp
# ./EcMasterDemo -fslfec 1 1 custom imx8m rgmii 7 nopinmuxing nomacaddr -t 0 -sp
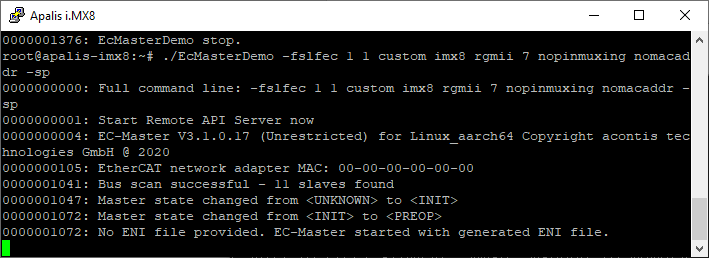
Since no EtherCAT network configuration (ENI) is provided, the maximum EC-Master state is PreOperational.
Create an ENI with EC Engineer
After the installation of the EC Engineer, open it:
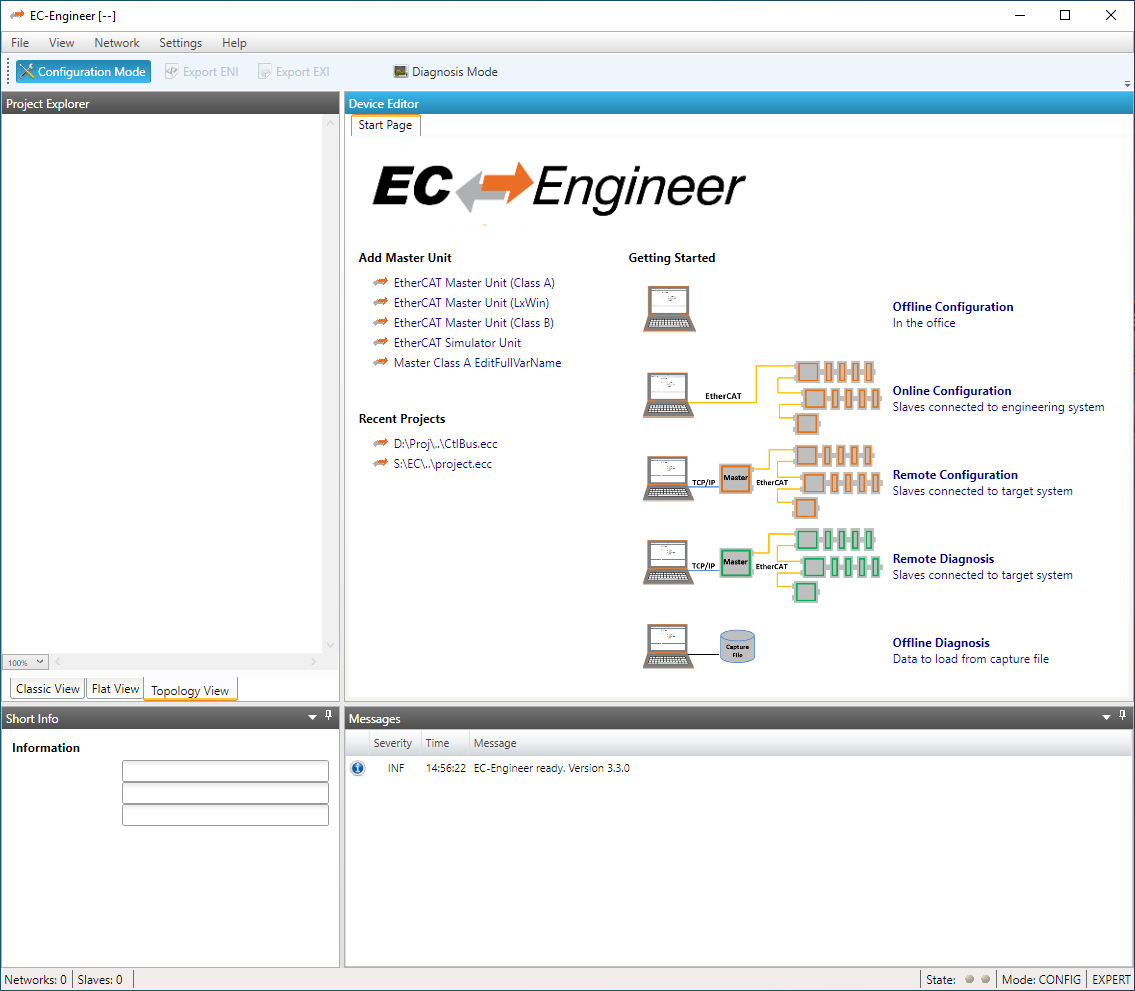
Click on the Remote Configuration option and select EtherCat Master Unit:
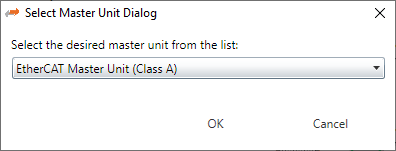
Enter the IP-Adress of your board and click on the Select button:

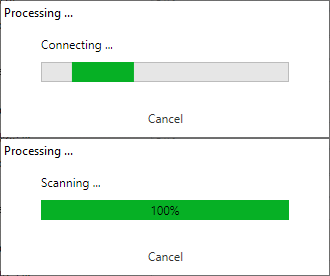
EC-Engineer automatically connects to the running EcMasterDemo on the board and scans the bus:
On the left side of the EC Engineer, you can see the Project Explorer showing all the slaves:
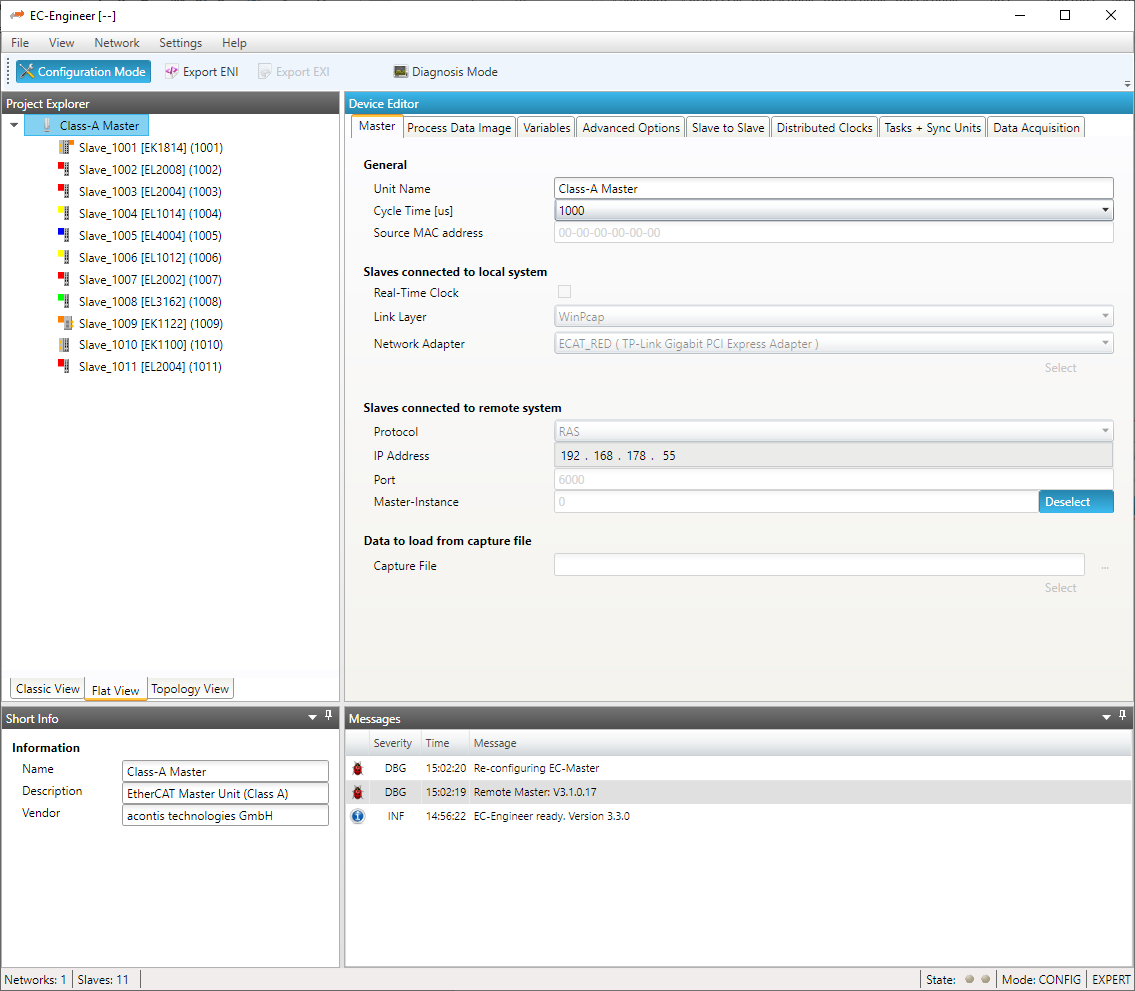
Click on the Export ENI, save it as eni.xml, and copy it into the /home/root directory of your board.
After that, run the EcMasterDemo with additional command-line parameters:
# ./EcMasterDemo -fslfec 1 1 custom imx6 rgmii 7 nopinmuxing nomacaddr -t 0 -sp -f eni.xml
# ./EcMasterDemo -fslfec 1 1 custom imx8 rgmii 7 nopinmuxing nomacaddr -t 0 -sp -f eni.xml
# ./EcMasterDemo -fslfec 1 1 custom imx8 rmii 2 nopinmuxing nomacaddr -t 0 -sp -f eni.xml
# ./EcMasterDemo -fslfec 1 1 custom imx8m rgmii 7 nopinmuxing nomacaddr -t 0 -sp -f eni.xml
The master now reaches an Operational state!
The EC-Engineer has also built-in diagnostic features. Click on the Diagnosis Mode to connect again to the running EcMasterDemo on the board:
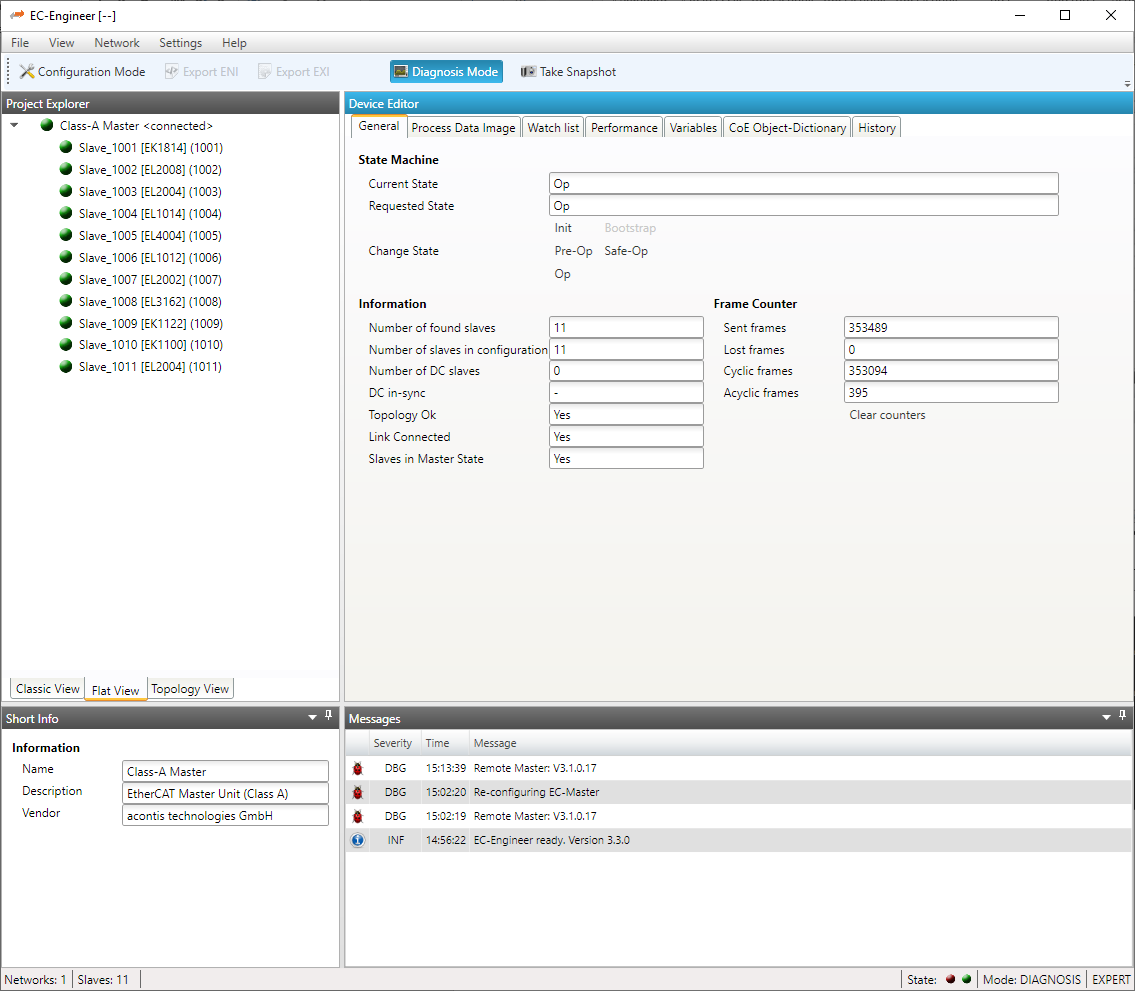
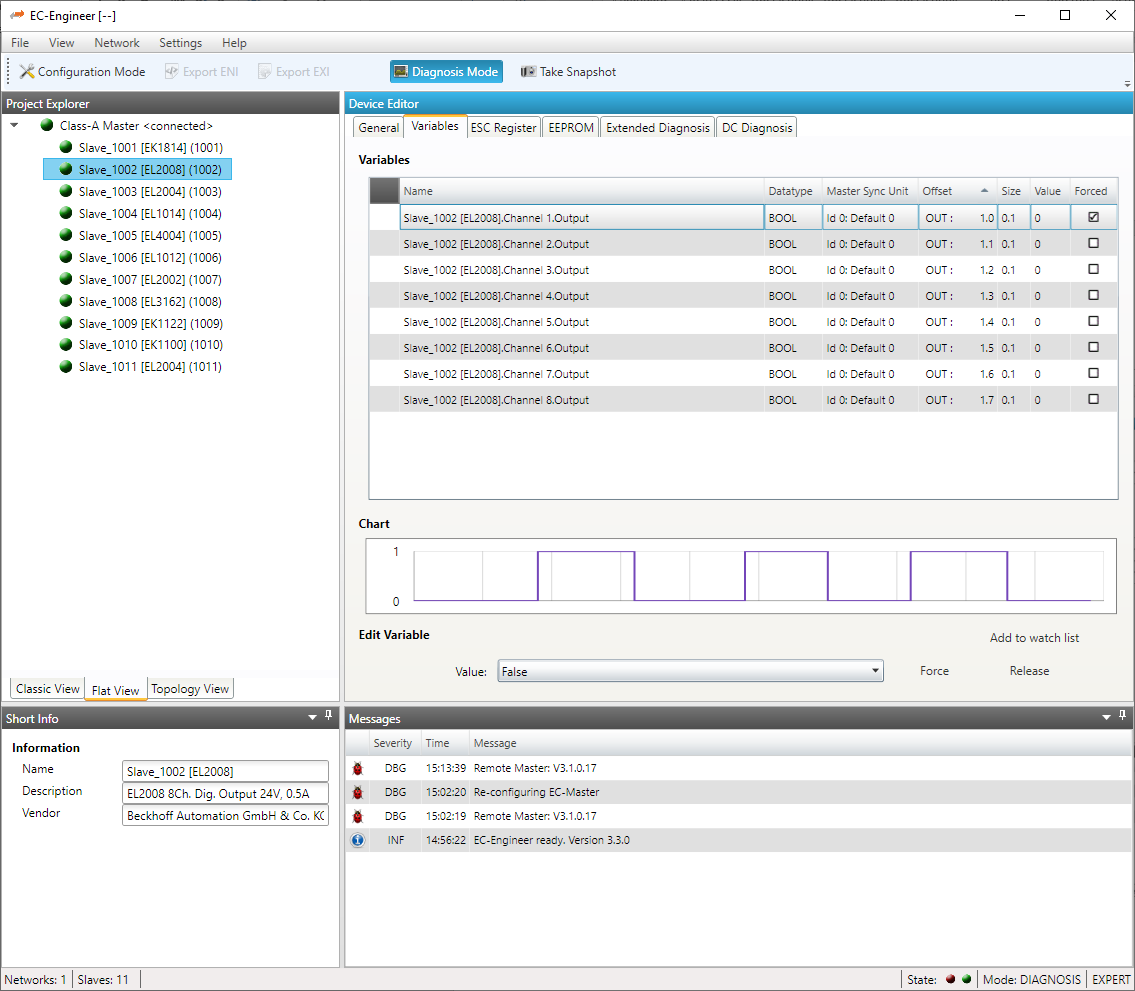
You can browse through the slaves and monitor/change the state of the variables:
Next Steps
For more information about how to get this demonstration image supported and customized, get in contact with acontis.
Acontis has a Yocto layer for the integration of the atemsys kernel module, read more about it on the acontis Partner page.
Licensing
For more information about the Licensing, please get in contact with acontis technologies using their official support.
Release Notes
The release notes are related to the Partner Demo Image, and not to the EC-Master EtherCAT Stack. If you are interested in EC-Mster EtherCAT Stack release notes, contact acontis.
V3.1.1.01
- First image available for Apalis iMX6, Colibri iMX8X(V1.0D and V1.0B), and Verdin iMX8M Mini.
V3.1.0.17
- First image, available only for Apalis iMX8.
Downloads
Download older releases of EC-Master EtherCAT here: