Attention: the Quickstart Guide for BSP 2.8, based on the Ångström distribution, is not being updated anymore. Depending on your SoM, you have different options:
Vybrid and Tegra: the information is provided as-is and still accurate, since newer Toradex BSPs are not ported to those SoMs. Just keep in mind that the Guides are not being maintained anymore, even if we find bugs or outdated instructions.
Apalis TK1 (all variants), Colibri iMX6ULL (all variants), Colibri iMX7S 256MB and Colibri iMX7D 512MB: these computer on modules are still regularly maintained in our BSPs and, to get started, you must check the software page Toradex BSP Layers and Reference Images for Yocto Project. Since Torizon is not supported, at the moment a Quickstart Guide is not available.
All other i.MX-based SoMs: you have two options to get started with embedded Linux: the first is to follow the Quickstart Guide for Torizon, which provides the greatest out-of-the-box experience, or if you choose to use Yocto, check the software page Toradex BSP Layers and Reference Images for Yocto Project.
In this section, you will configure the Eclipse IDE for cross-compilation and learn how to use it to deploy your application to the target.
Information provided in this section was based on the Linux SDKs and the Hello World application on Embedded Linux articles from Toradex' knowledge-base. Notice that even though the latter uses the Linaro toolchain, the concepts presented can be applied when using the OpenEmbedded SDK as well.
In this module you will:
Note: This guide provides information for the Eclipse Neon 3 release. Other releases than Neon may require extra steps to be followed which are not covered in this guide.
Note: On versions newer than Ubuntu 16.04 LTS, you must choose to either replace Java 11 by Java 8 or use a newer version of Eclipse.
Go to the Eclipse Neon 3 packages page and download the Eclipse IDE for C/C++ developers:
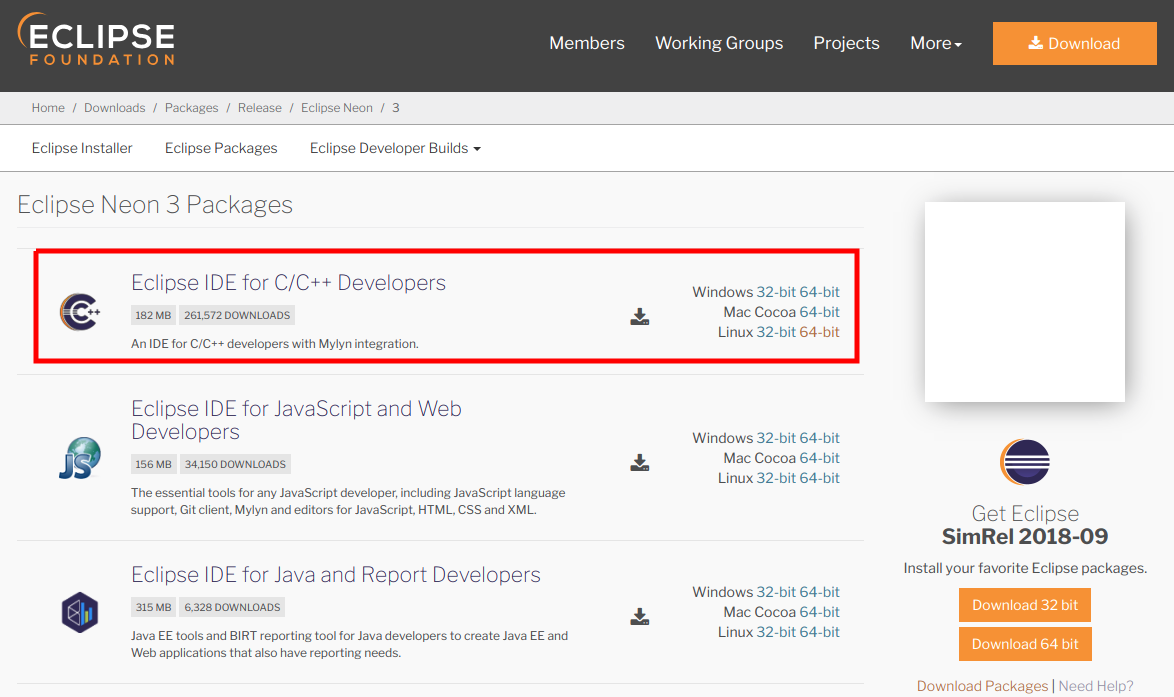
Download Eclipse Neon IDE for C/C++ developers
For illustration purposes, consider that Eclipse is downloaded to ~/Downloads.
Make sure you have Java installed before proceeding:
sudo apt-get updatesudo apt-get install default-jreNote: this lesson has been written for Ubuntu 16.04 LTS, as stated in the module 1 cover page. On versions newer than Ubuntu 16.04 LTS, you must choose to either replace Java 11 by Java 8 or use a newer version of Eclipse.
Here is an example how to install Java 8:
sudo apt-get install openjdk-8-jresudo update-alternatives --config javaCreate a directory for Eclipse installations and extract the contents of the downloaded file:
cd ~mkdir -p ~/eclipse/neon-3tar xf ~/Downloads/eclipse-cpp-neon-3-linux-gtk-x86_64.tar.gz -C ~/eclipse/neon-3/Note: Using this directory structure, you can install other versions of Eclipse for testing in the same directory, for instance at ~/eclipse/latest/
You can check that it went as expected by verifying the directory structure:
user@host:~$ ls ~/eclipse/neon-3/eclipseuser@host:~$ ls ~/eclipse/neon-3/eclipse/artifacts.xml configuration dropins eclipse eclipse.ini features icon.xpm notice.html p2 plugins readmeGo to the Eclipse installation folder created in the previous step:
cd ~/eclipse/neon-3/eclipseAttention: If you close Eclipse and the terminal, you need to export the variables again before starting Eclipse.
. /usr/local/oecore-x86_64/environment-setup-armv7at2hf-neon-angstrom-linux-gnueabi./eclipseWarning: In the first command above, notice that there are a dot and space before the path to the script.
You will be asked to choose a workspace to keep your projects and configurations:
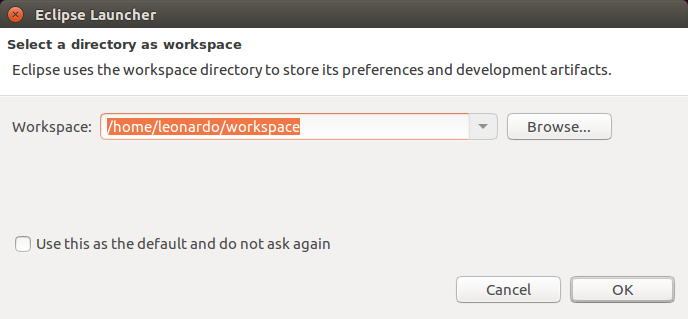
Default workspace
In the welcome page, select:
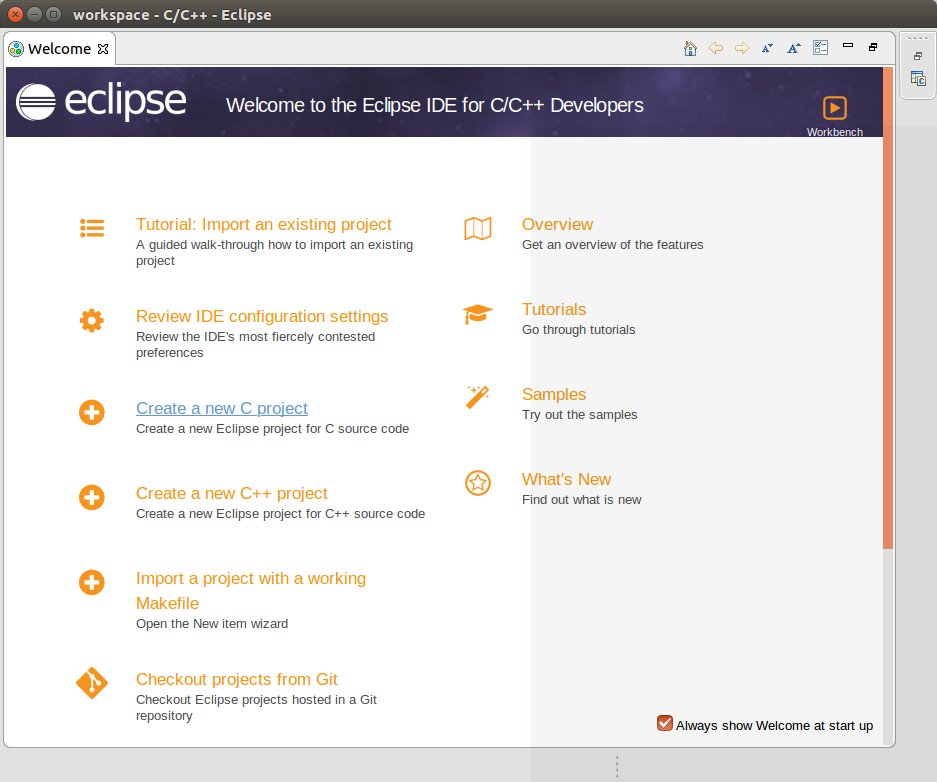
Default workspace
Give a name to the project. Select:
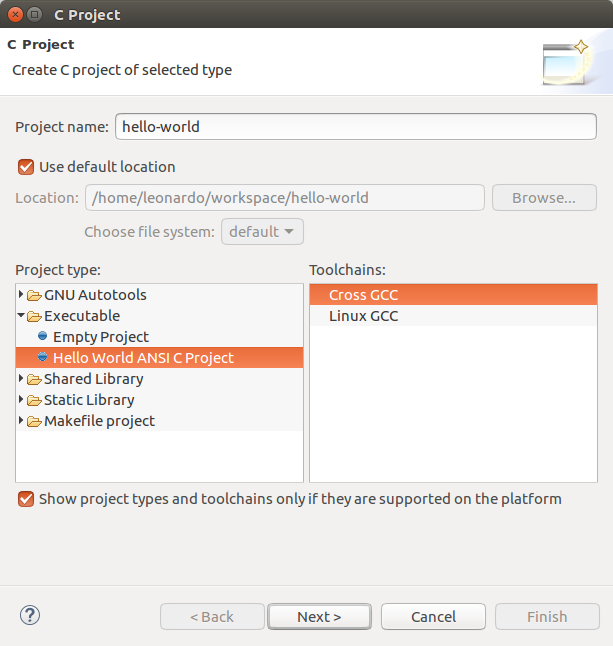
Project setup part 1
Type your name and proceed:
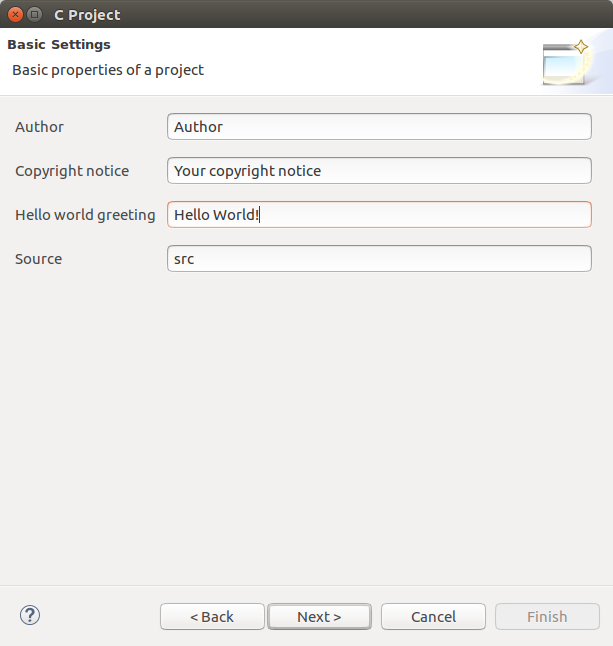
Project setup part 2
Select the debug and release configurations and click the next button:
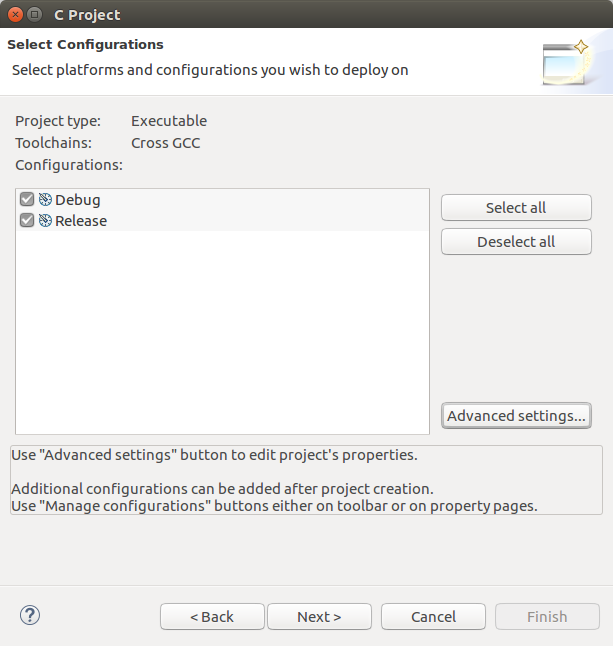
Project setup part 3
Leave the cross-compiler prefix and path empty:
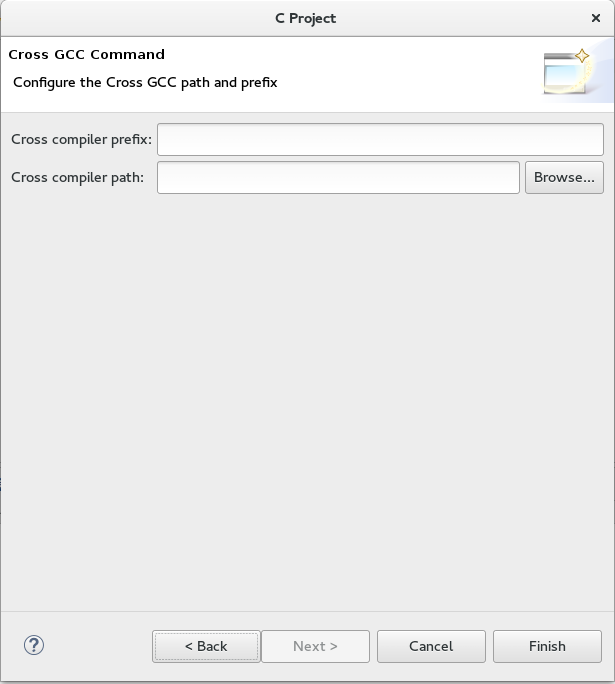
Project setup part 4
Click the finish button.
In the toolbar, click Project and select Properties from the drop down menu:
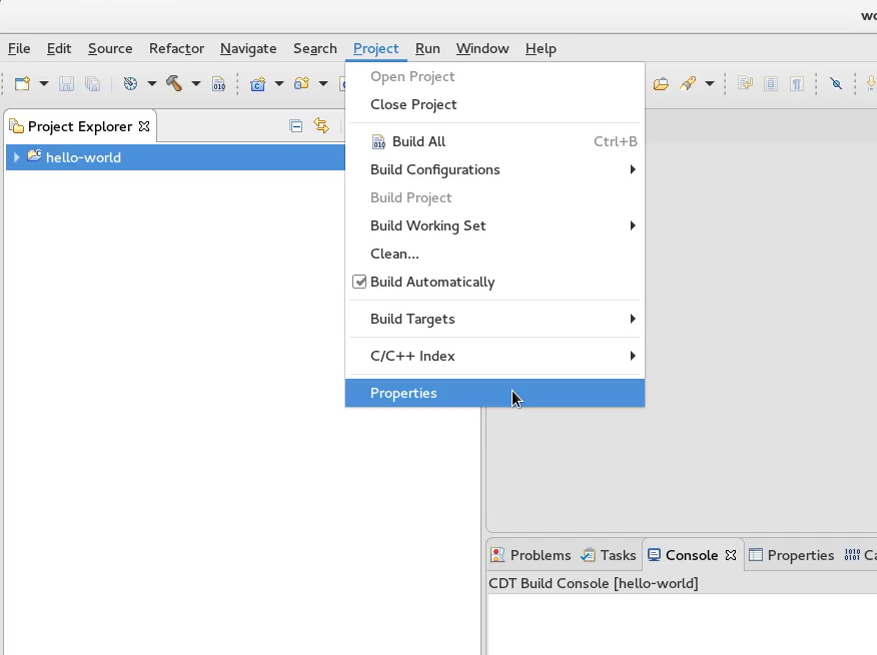
Project Properties
Go to the tab:
Choose the option:
From the Configuration dropdown menu:
In the Command field, replace the contents with the Cross Compiler variable "${CC}", as presented below:
${CC}See the image for reference:
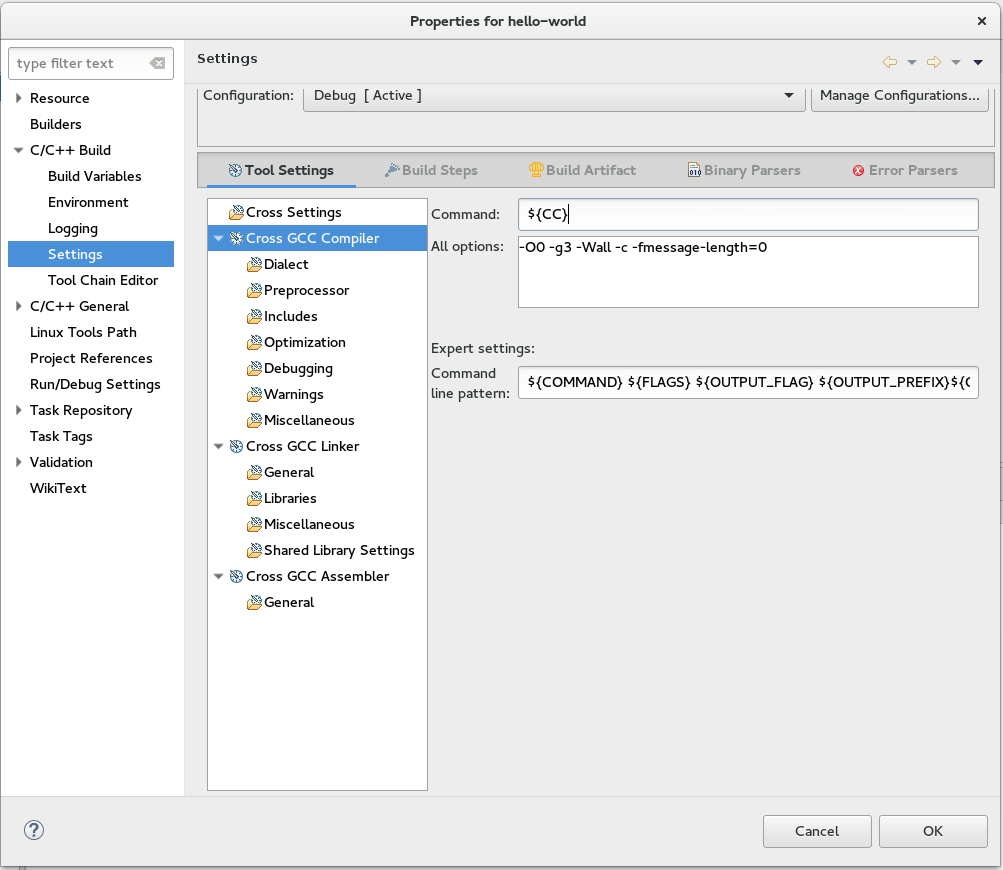
Setting the Command variable
Go to the tab:
Choose the option:
From the Configuration dropdown menu:
In the Other flags field, replace the contents with the variable "${CFLAGS} -c", as presented below:
${CFLAGS} -cSee the image for reference:

Setting the Other Flags to use variable from Cross Compiler Enviroment
Note: The current level of compiler optimization set in CFLAGS (-O2) might impair debug to some extent. If you have trouble debugging applications of your own, you may try substituting '${CFLAGS} -c' to '-Og -pipe -g -feliminate-unused-debug-types -c'
Go to the tab:
Choose the option:
From the Configuration dropdown menu:
In the Command field, replace the content with the Cross Compiler variable "${CXX}", as presented below:
${CXX}See the image for reference:
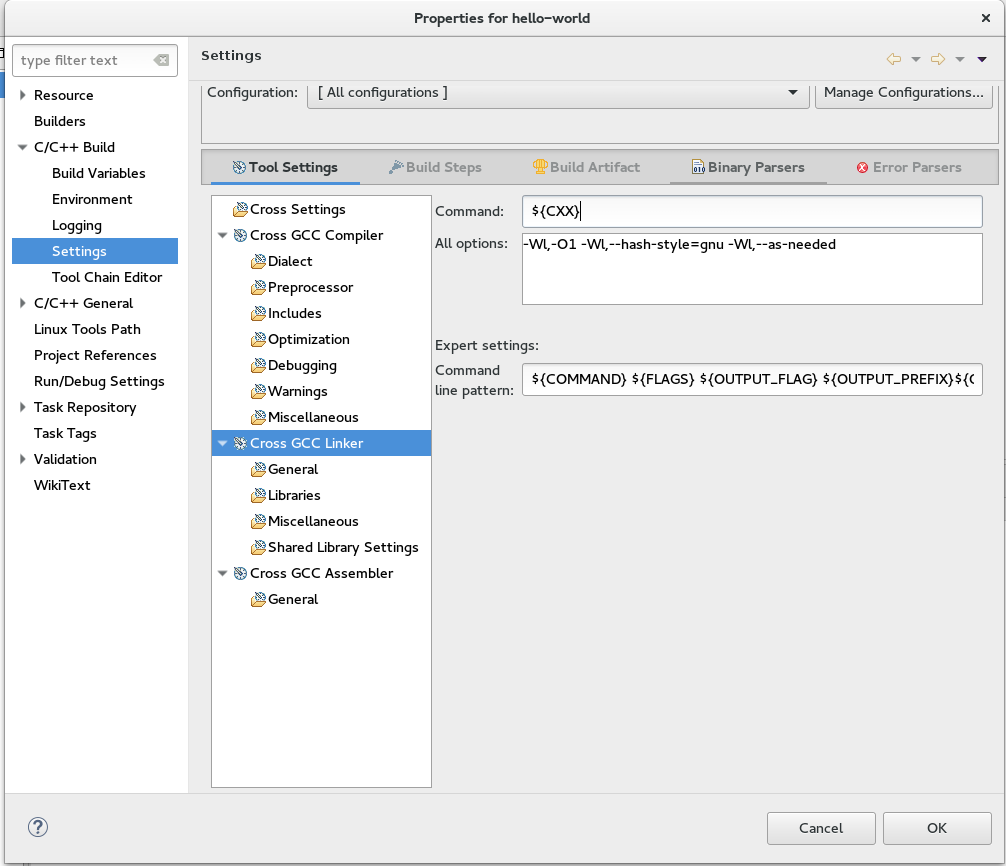
Setting the Command variable
Go to the tab:
Choose the option:
From the Configuration dropdown menu:
In the Linker flags field, replace the content with the variable "${LDFLAGS}", as presented below:
${LDFLAGS}See the image for reference:
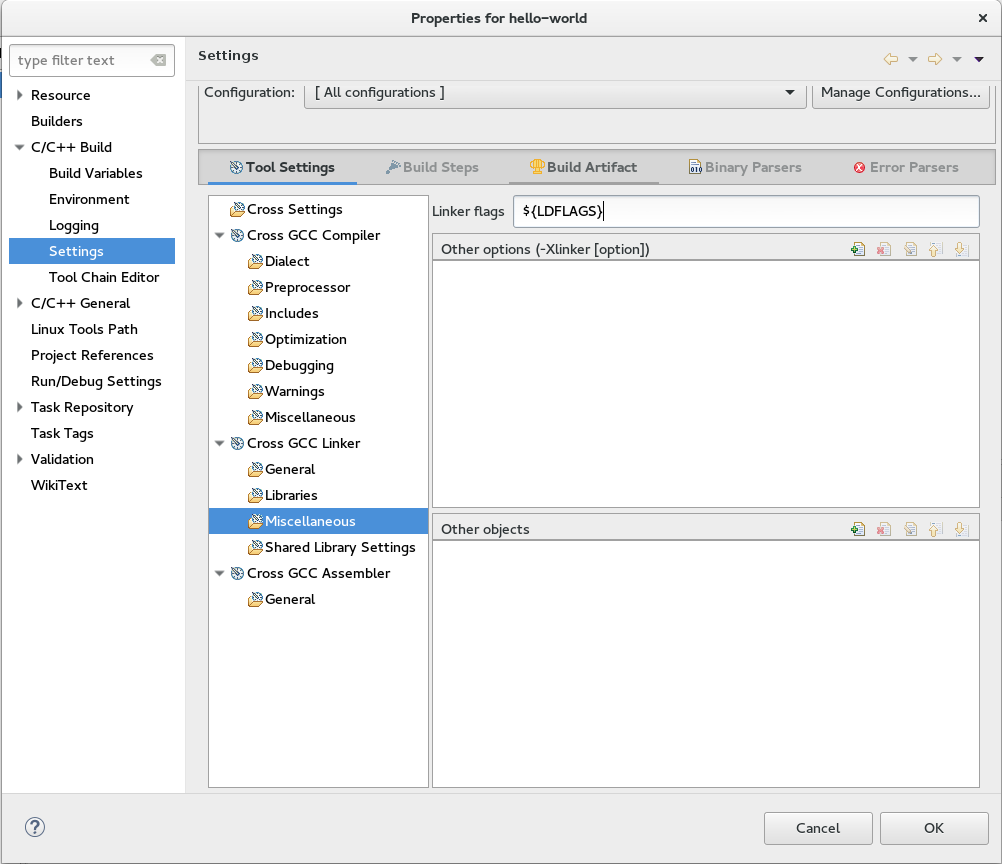
Setting the Other Flags to use variable from Cross Linker Enviroment
Go to the tab:
Choose the option:
From the Configuration dropdown menu:
In the Command field, replace the content with the Cross Compiler variable "${AS}", as presented below:
${AS}See the image for reference:
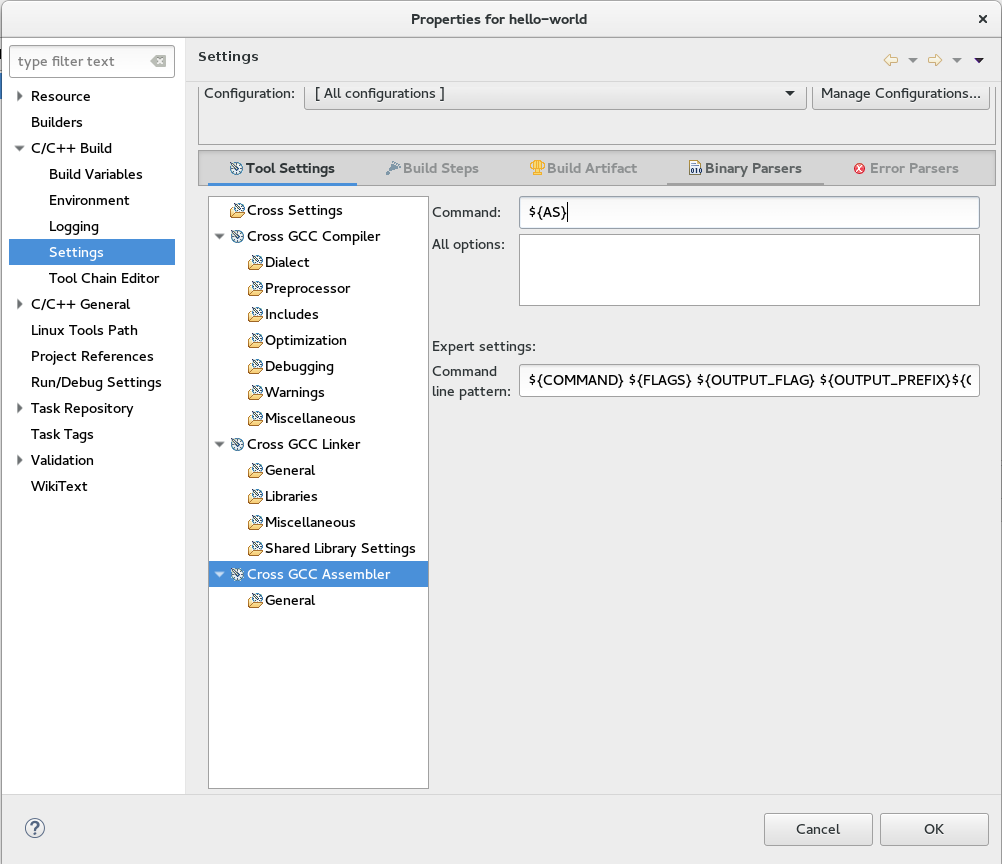
Setting the Command variable
After you are done:
You will return to the previous menu:
Press Ctrl+B or click the build all button to build the project. A build log will tell if you succeeded:
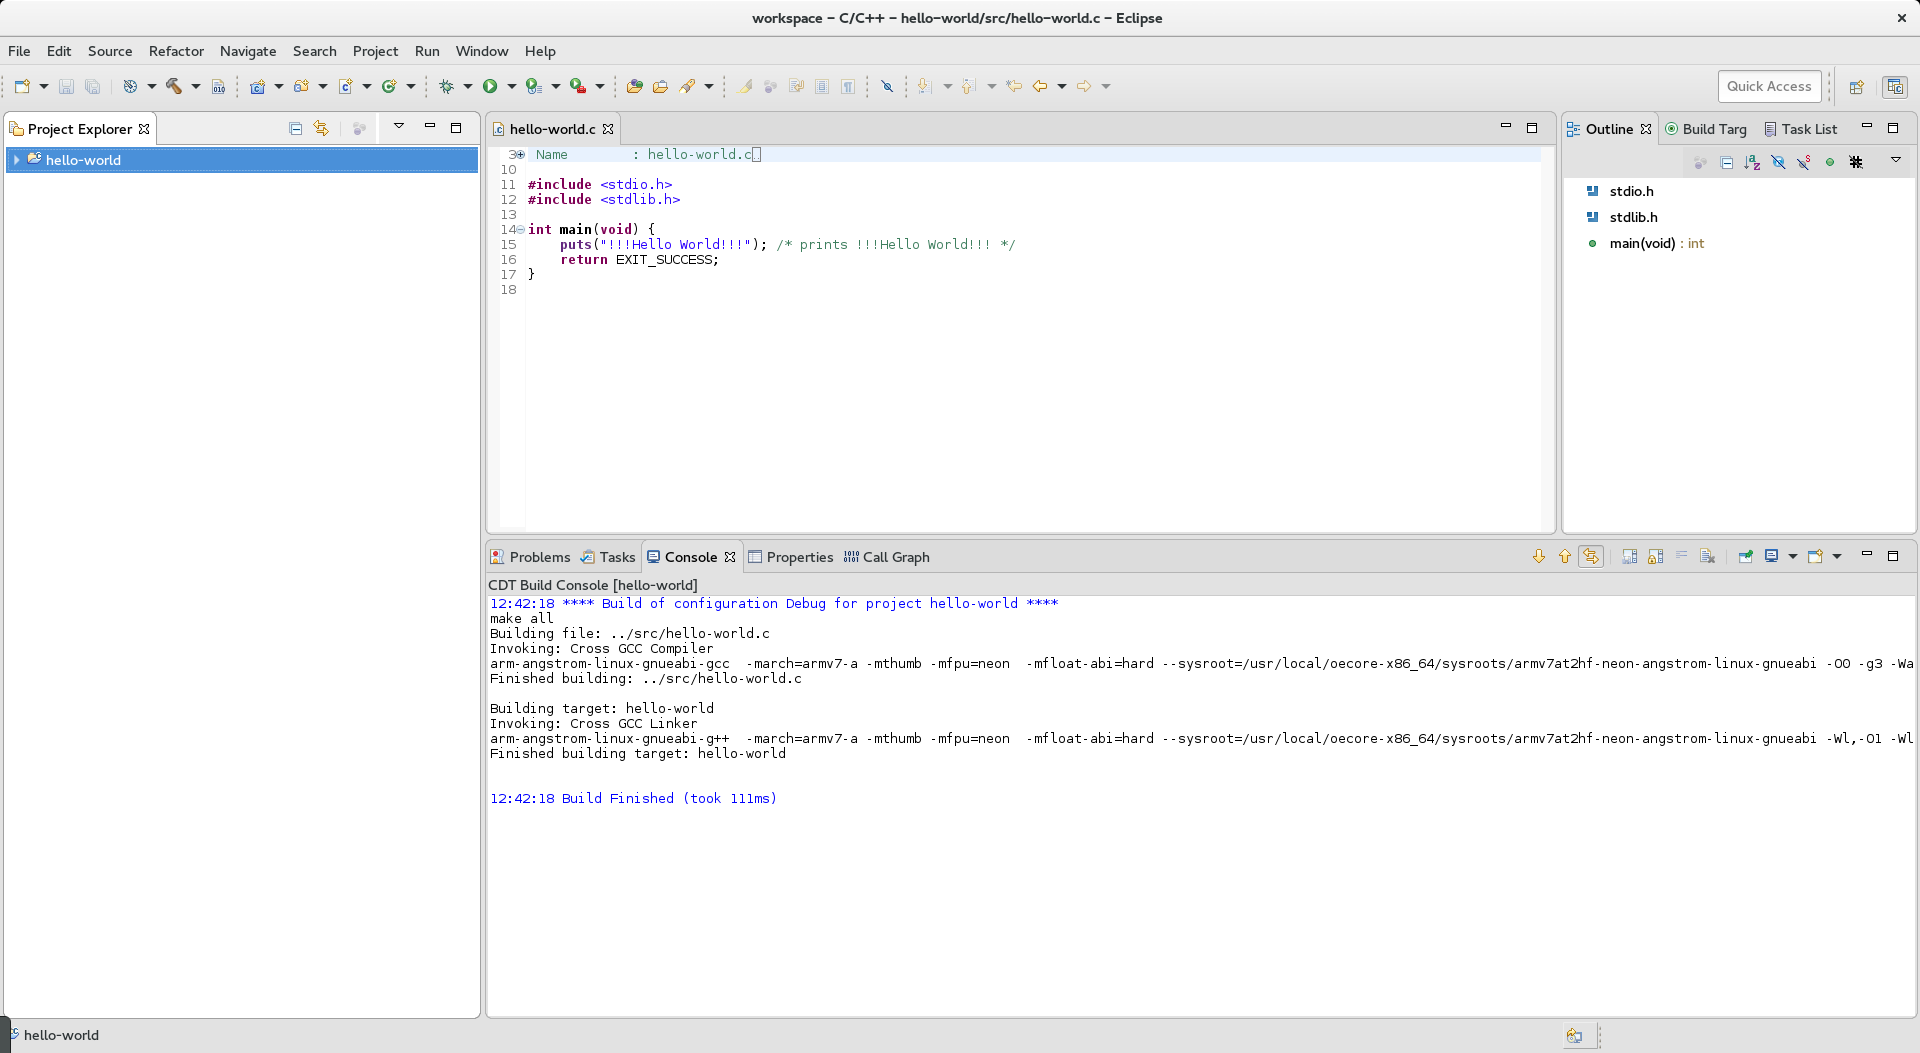
Build button and log
This lesson covers the basics of Eclipse IDE configuration, therefore this FAQ section is meant as an information complement.
