Toradex Easy Installer is a tool that enables you to flash an OS image to the Computer on Module with a few clicks and very easily. It comes pre-installed from factory for seamless out-of-the-box and production programming experiences.
In this module you will:
For this lesson:
Note: Carefully read this module's cover page clicking on "Module 1: Unboxing and Bring-up" on the left menu bar before starting this lesson.
Press the on/off switch (SW7):
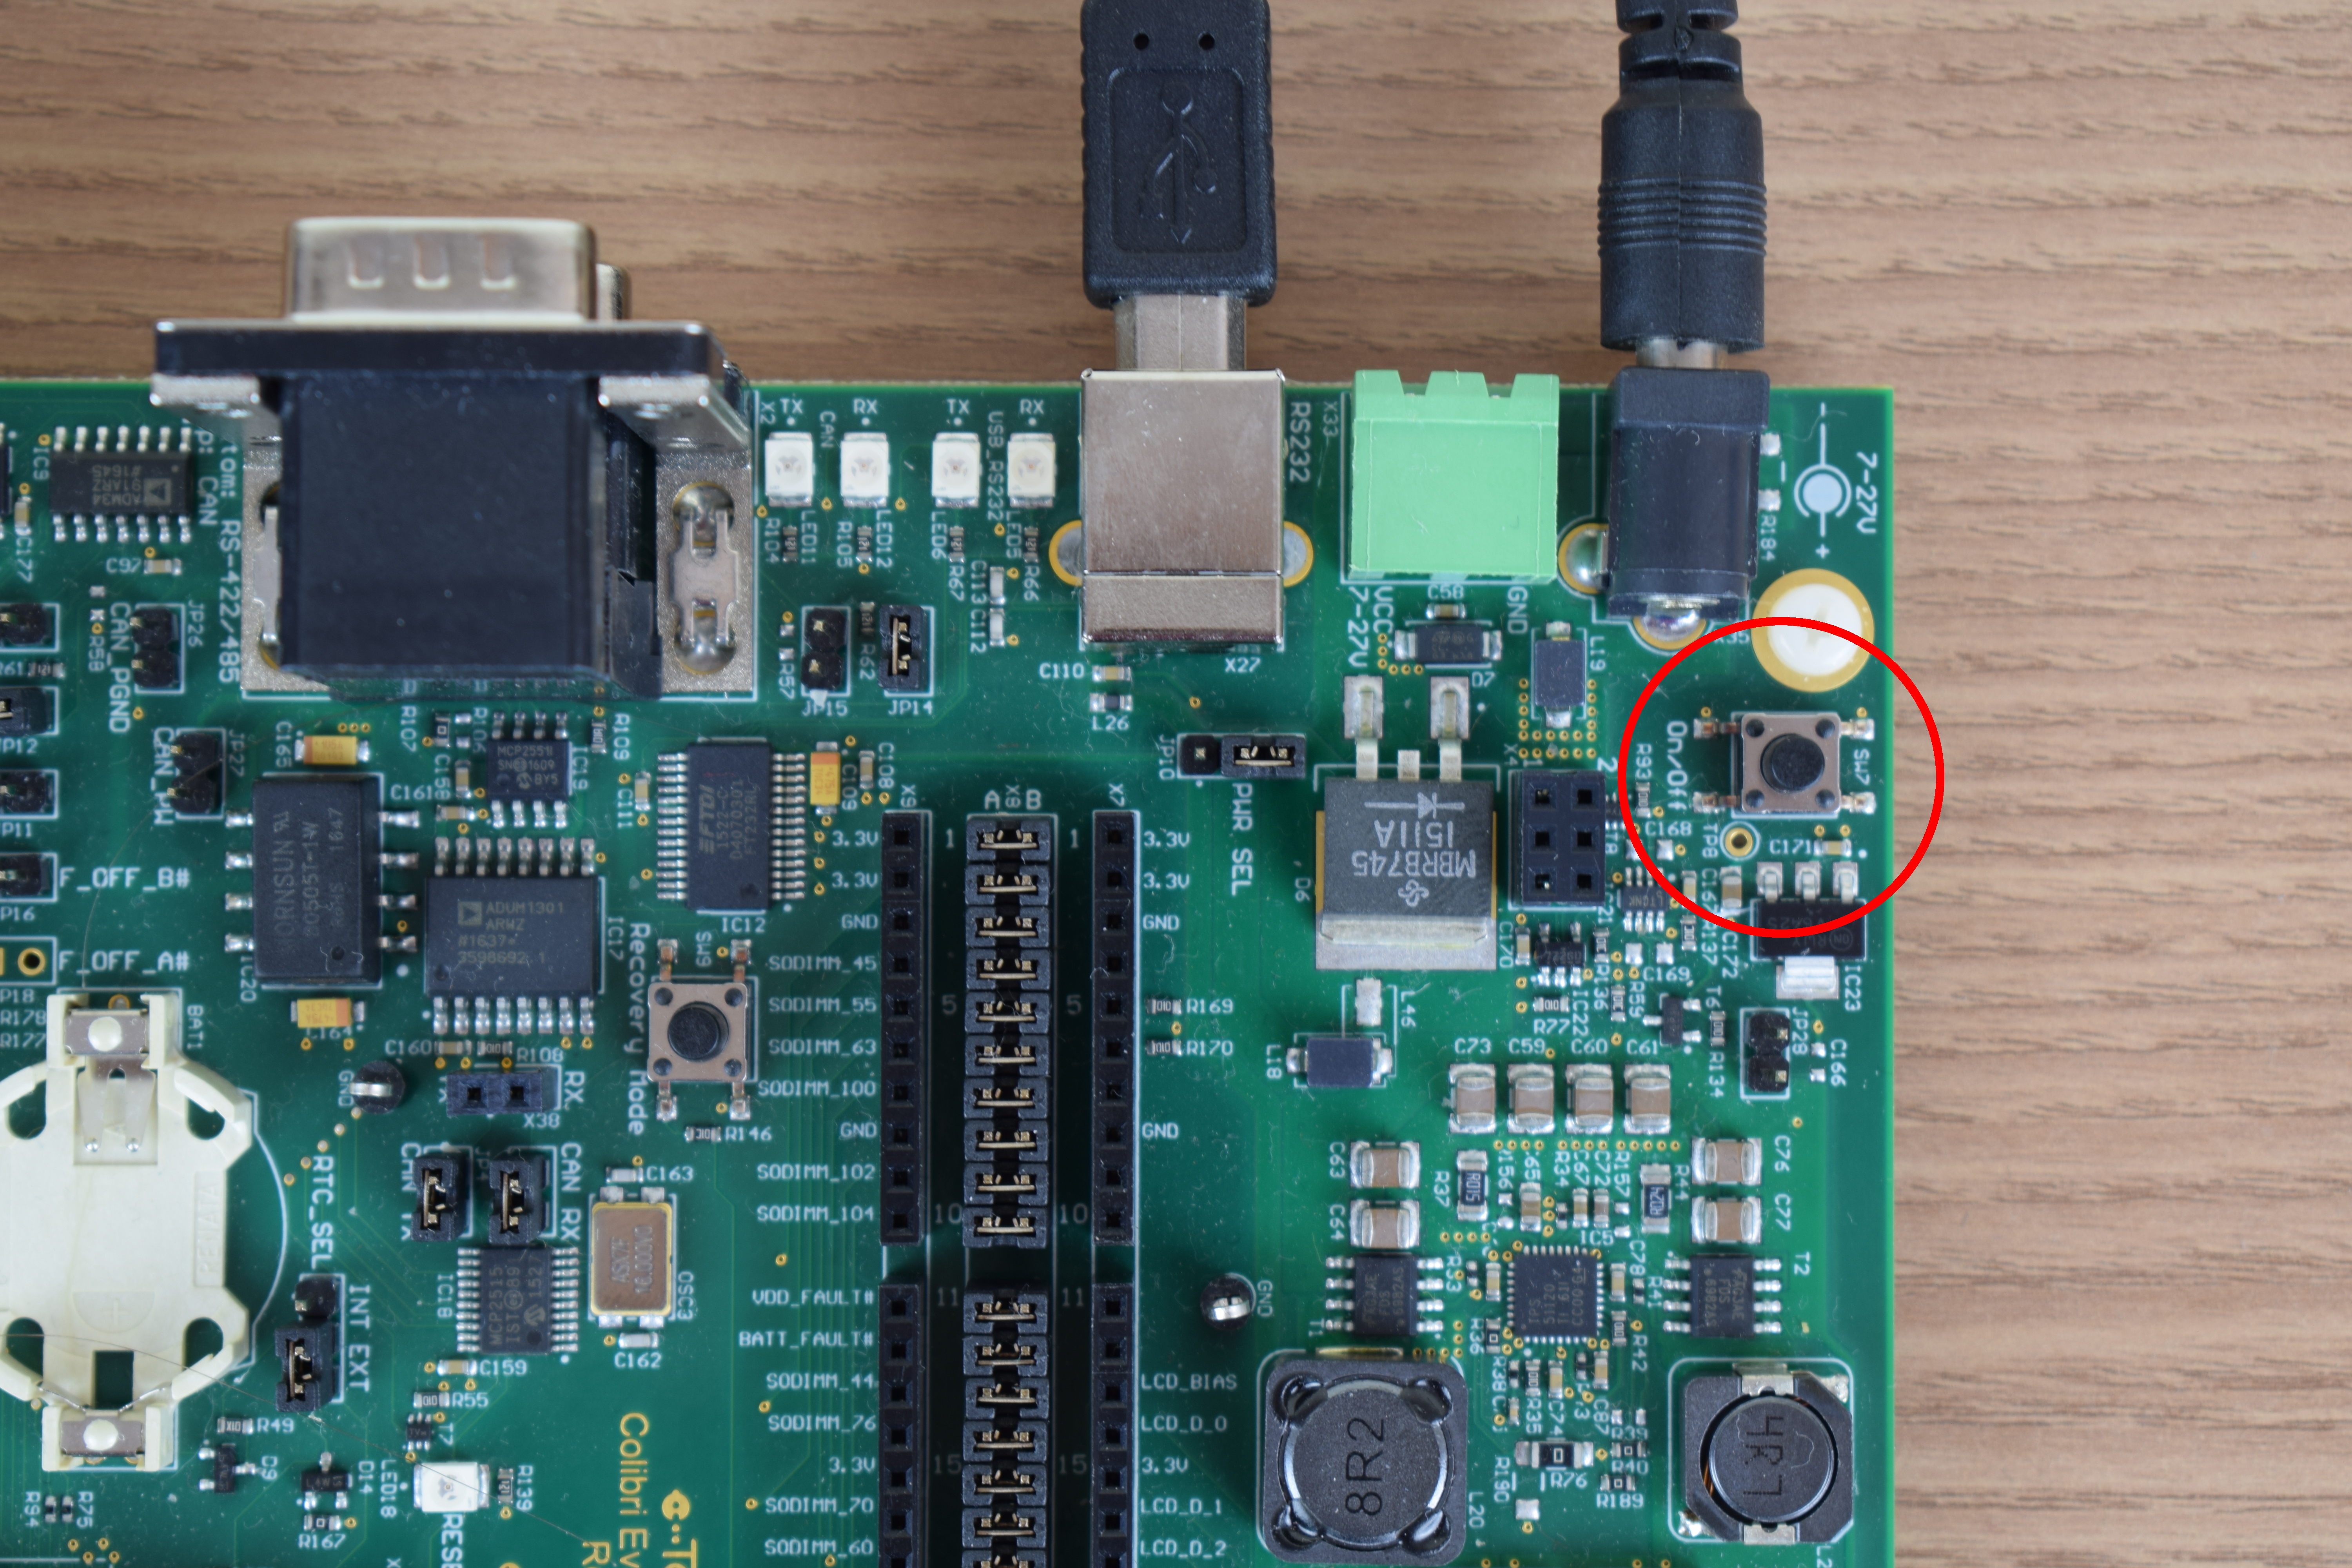
On/off switch
You should see the Toradex Easy Installer displayed on the monitor attached to the VGA port of the Colibri Evaluation Board. Images available for download are listed. If none are currently shown, check that the Ethernet cable is connected and press "r" to refresh.

Toradex Easy Installer
As observed in the screenshot above, the IP address in the example is 192.168.1.109.
Warning: Make sure you take note of your board's IP address, as highlighted in the picture. You will need it for the next lessons. The /24 at the end is just the ip mask, please disregard it. To use ssh, stick to the default port 22.
Your module should have come with the Toradex Easy Installer pre-installed.
If this isn't the case, you can follow the link below to deploy the Toradex Easy Installer to the module before proceeding:
Loading Toradex Easy Installer
Notice that there are two types of images for Torizon. You will use the one that provides the best out-of-the-box user experience:
TorizonCore with evaluation containers: to provide the best out-of-the-box experience, this image comes with Portainer, a graphical container manager, pre-installed. We'll use this image on the Quickstart Guide and you will learn more about Portainer in the next lessons.TorizonCore: this image does not have any evaluation containers pre-installed. It is best suitable for later steps of development. For instance, once you start to customize the TorizonCore base image using tools as the TorizonCore Builder Tool, you'll most likely want to use the TorizonCore image.To install Torizon use the connected keyboard arrow key buttons to navigate and select the latest version of TorizonCore with evaluation containers.
Due to differences in the revisions of NXP i.MX 8X SoC, different versions of Colibri iMX8X require different software. Examine the label on the Computer on Module to find its version:

Find the Version of your Colibri iMX8X
Then, on the Toradex Easy Installer, select the corresponding image to your hardware version, press i to install and Enter to confirm:

Torizon Image for Colibri iMX8X V1.0B

Torizon Image for Colibri iMX8X V1.0C and Newer
Note: While executing this step make sure your board is connected to the internet and connection is established successfully.
Wait for the image to be downloaded and installed:

Torizon Installation
After the Image Installed message pops-up, select the Power off option to shut down the system.

Installation finished
